The koalas cuddling lazily in the trees at the zoo are loved by people. Clay koalas are a great craft idea. It sounds hard, but we can actually make a cute koala using a kind of lightweight clay!
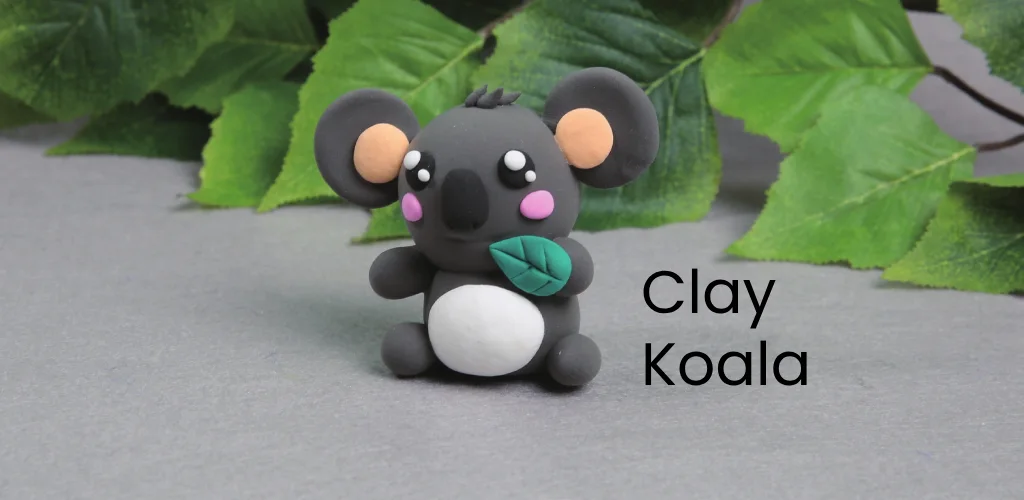
Next, we’ll make a gray clay koala step by step using air-dry clay that’s as light as a cloud. You can follow along with us, pick up clay and create your own crafts.
Material Preparation
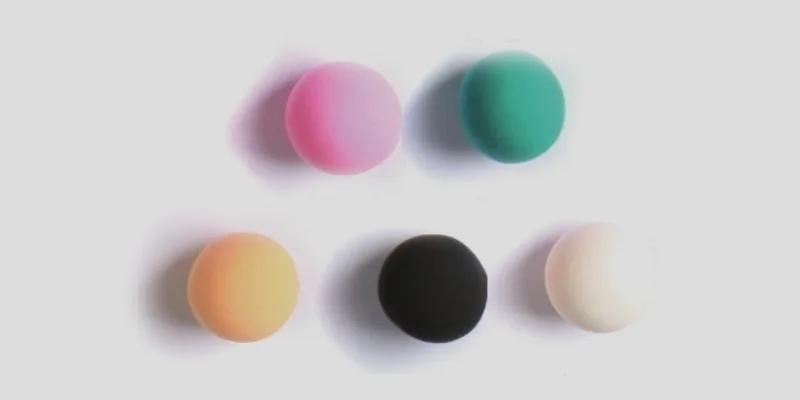
Before making, we need to prepare some materials. Here we will use air-dry clay, which is a popular lightweight clay that you can buy in toy stores or stationery stores.
- Air-dry clay (5 colors): white, black, flesh color, cyan, pink
Since it dries easily and requires no baking, it is more convenient and safer than traditional clay. Often, schools also teach children to use it to make handicrafts.
In addition to clay, you will also need some small tools that can help you touch up the details of your koala.
- Tools: plastic knife, small scoop
Air-dry clay dries and hardens slowly at room temperature. If you are a beginner, get a squirt bottle and spray some water on the clay to keep it soft.
- Optional: squirt bottle
But don’t let the clay get too wet, as that may prevent proper drying.
10 Steps to Make an Air Dry Clay Koala
In this tutorial we’ll teach you how to mix different air-dry clay into new colors. In addition, with hand movements, we will create the body and details of the clay koala. Finally, we will learn how to use the tools.
Let’s get started!
Step 1: Make the Body of Clay Koala
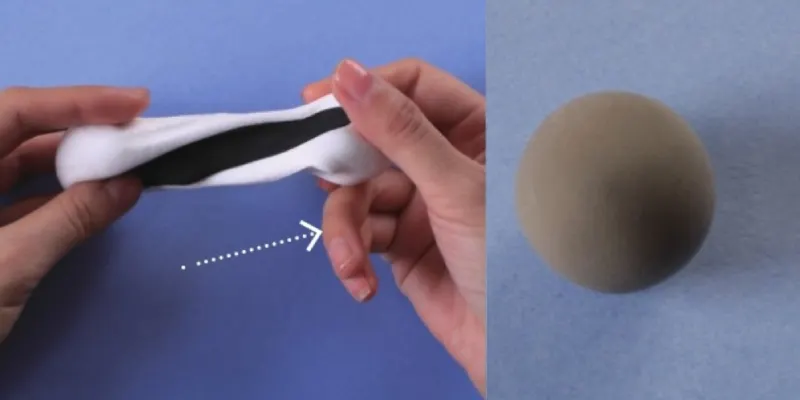
We start by taking white and black air-dry clay and mix it to become gray clay.
Divide the above gray clay into three parts. Use your hands to form two into balls of different sizes.
We will use the remaining part later, please put it back in the box and seal it well to prevent it from drying out. If you don’t have a box, use a Ziploc bag or plastic wrap.
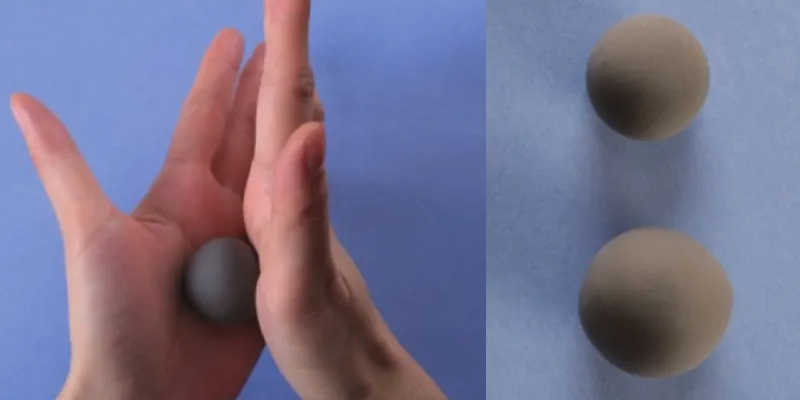
Next, we stick the two clay balls together like a snowman. When we use air-dry clay to create small animals, we usually make the head larger than the body.
So, here, the big clay ball is the koala’s head and the small one is the body.
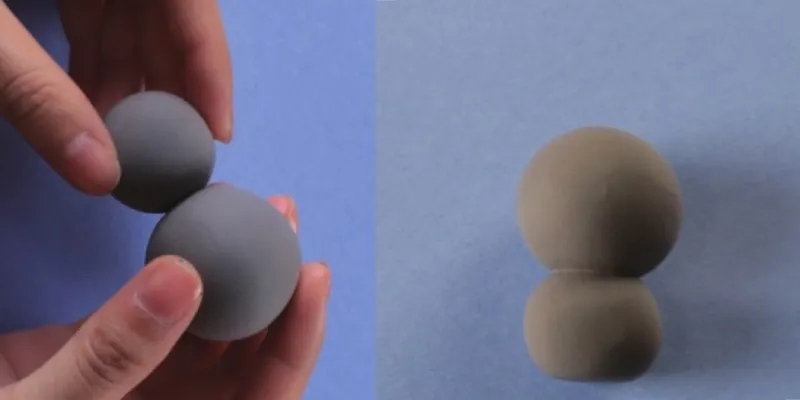
Pinch a bit of white clay and flatten it with your thumb, like a pizza pie. Attach the piece of clay to the koala’s body to serve as its belly.
Read More >> How to Make a Pizza With Air Dry Clay
The difficulty with this step is that you need to mix the white and black clay in the right proportions and create the ideal gray color.
You can mix and adjust as you go. When the gray is dark, add white, and when the color is light, add black. This process helps children understand colors and the principles of their mixing.
Step 2: Make the Ears of Clay Koala
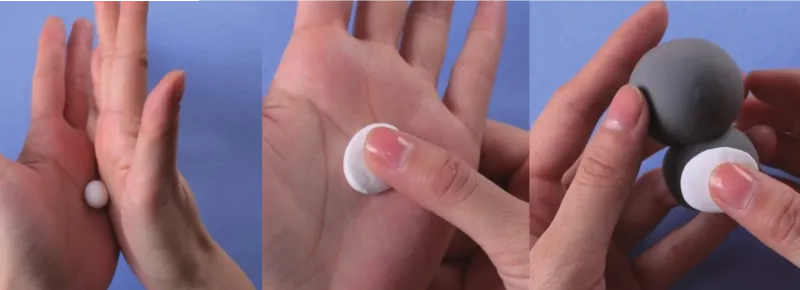
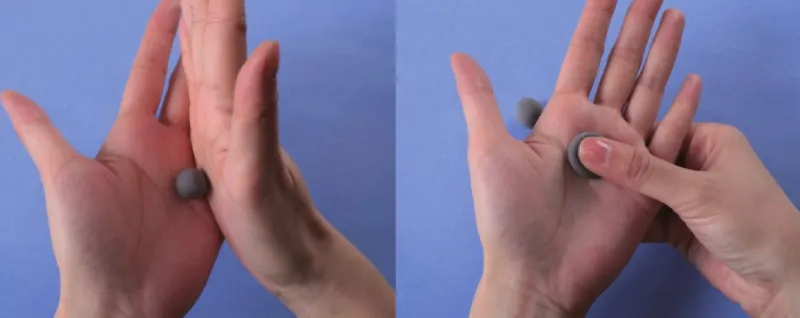
We have some left over gray clay from earlier which will be used to make the koala’s ears and limbs. Now, let’s take a small part and make the ear part first.
We take a small piece of gray clay in the palm and shape it into a ball. Then we flatten it slightly with our thumb. Note that the edge of the clay should be slightly raised to give the ears a more three-dimensional appearance.
We’re gonna make two ears.
Stick the finished ears onto the koala’s head. You don’t need to press it hard, the air-drying clay will stick to each other.
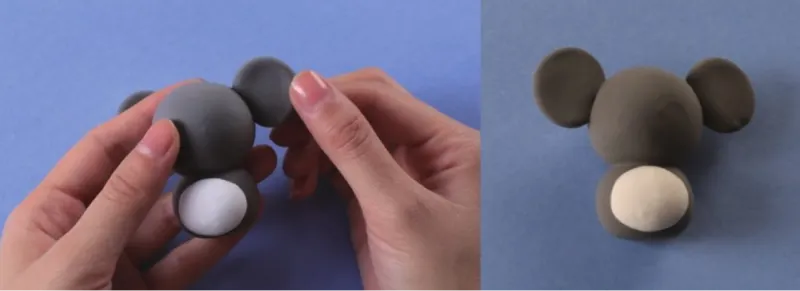
Take some flesh-colored air-dry clay and shape into two small balls. Then we gently flatten them with our fingertips.
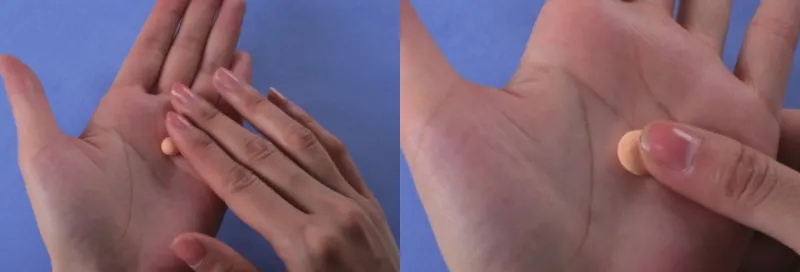
Place flesh-colored clay into the koala’s ears. You need to slow down and be careful not to leave your nails imprinted on the surface of the clay.
The difficulty in this step lies in the details. Since the ears are relatively small, you may not be able to control your trembling fingers at first.
After you try it several times, your fingers will slowly adapt and master the delicate operations. And, congratulations, your fingers will be more flexible than ever!
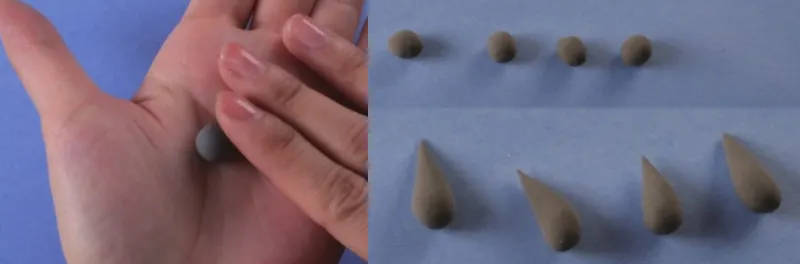
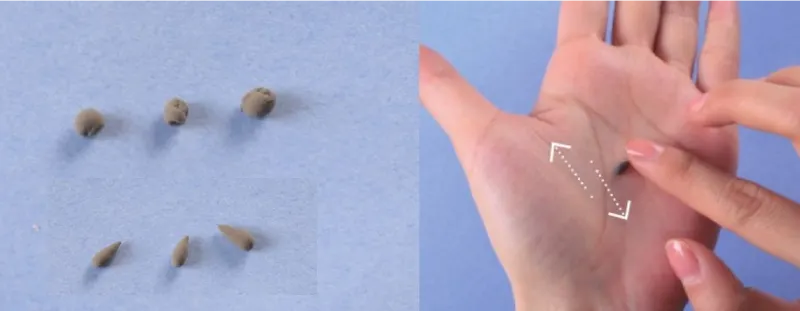
Step 3: Make the Limbs of Clay Koala
Take gray clay and roll it into long, thin strips on the table. Then use a plastic knife to divide it into four even portions.
Use your fingertips to roll the clay into a ball, then shape it into droplets. We don’t need to use too much clay, if there is any left, let it remain. Otherwise the koala’s hands and feet would be too big.
Stick the drop-shaped clay onto the koala’s body. All you need to do is press the tip of the droplet gently against your sides.
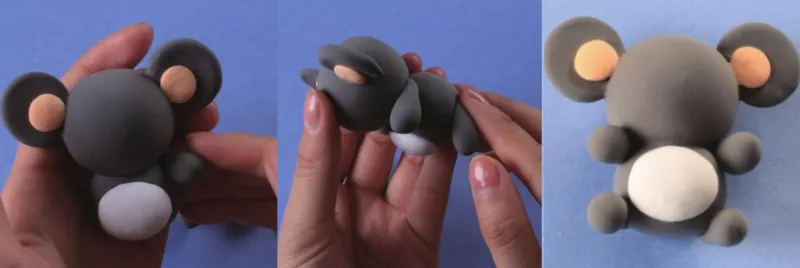
This step is easy, all you have to do is make sure the clay koala’s hands and feet are the correct size.
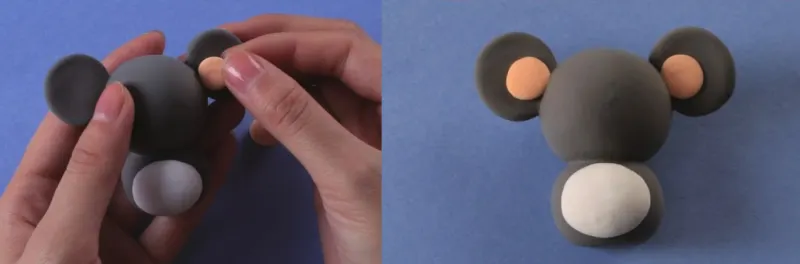
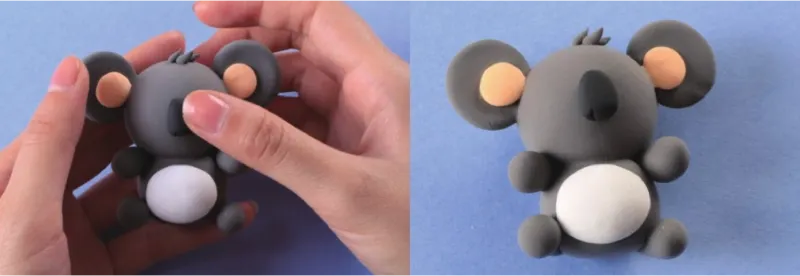
Step 4: Make the Hair of Clay Koala
Now let’s give the koala some hair. Take a little bit of gray clay and shape three small balls. Roll one end of the ball into a drop shape.
Stick three hairs to the top of the koala’s head. Since they are tiny, you can hold them in place with the help of a knife or other tool.
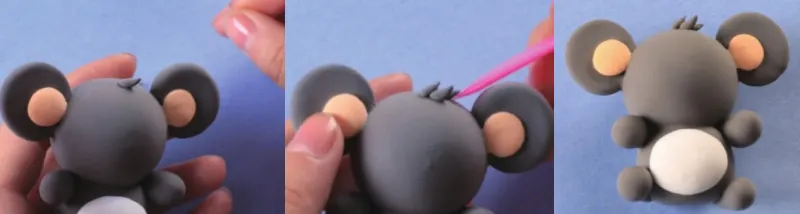
The difficulty with this step is that the hairs are small and it may be difficult for you to stick them in the right place with your fingers. Therefore, we must learn to use tools, especially the plastic knife. We will use it from time to time when making air-dry clay crafts.
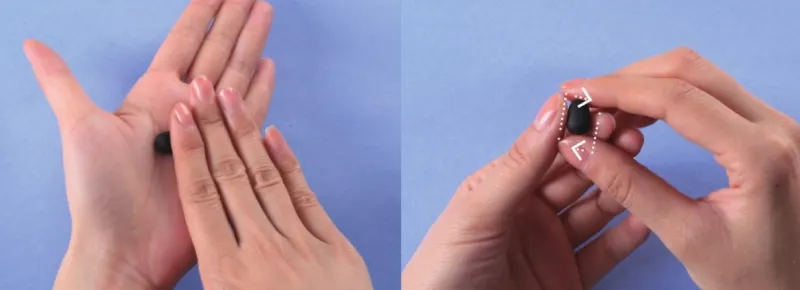
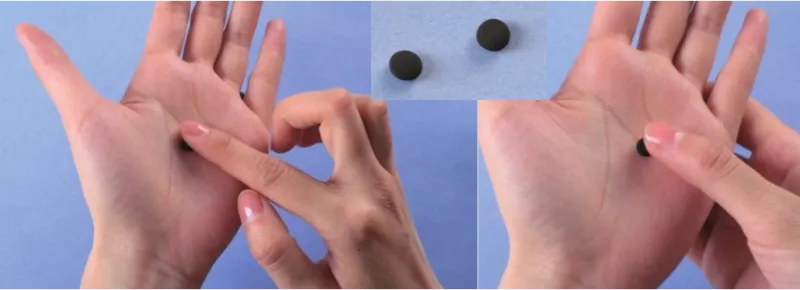
Step 5: Make the Nose of Clay Koala
Next, we will make the koala’s eyes and nose. These parts are relatively delicate and are a big test for our fingers.
Take a small ball of black clay and knead it into a trapezoidal cylinder with rounded ends. You can adjust its curvature with your fingers, don’t make it too sharp.
Use a plastic knife to cut out the two nostrils of the koala from the bottom of the black clay.
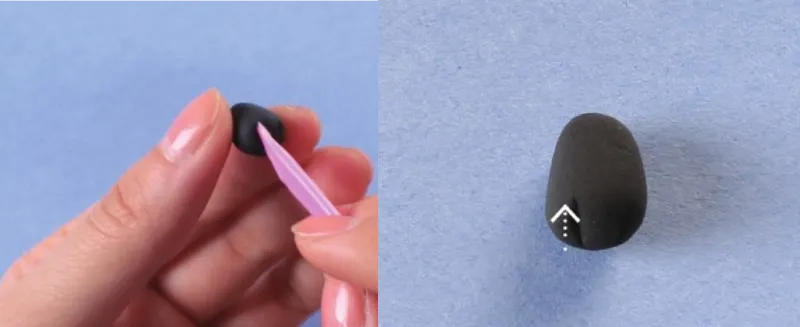
Stick the nose in the middle of the koala’s face.
This step is not too difficult, you may need to spend some time shaping the clay into a nose. In the process, your fingers will become more and more flexible. For young children, they will understand shapes and develop sensory cognitive abilities.
Step 6: Make the Eyes of Clay Koala
For the eyes we will use white and black clay. First, we take a little bit of black clay, roll it into two small balls, and then flatten them slightly.
Place two pieces of black clay symmetrically on either side of the koala’s nose.
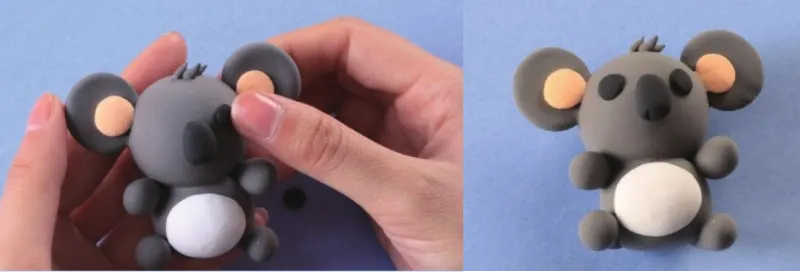
Take white clay and roll it into four small balls: two big ones and two small ones. Note that the big ones should be smaller than the black clay just now.
Stick a large and a small white clay to one of the koala’s eyes. This will make the koala’s eyes look shiny and more vibrant. Do the same with the other eye.
The difficulty in this step is also the details. If you have already overcome the trembling of your fingers, this step will be easier for you.
In addition, this step also requires you to be able to judge how much clay to use. If you use more white clay than black, you won’t be able to create watery eyes.
Step 7: Make the Mouth
Making the clay koala’s mouth is the easier step. We will use a plastic knife and a small spatula.
First, we use a knife to gently draw an arc under the koala’s nose. Then, we used a small scoop to press out a tooth-like effect.
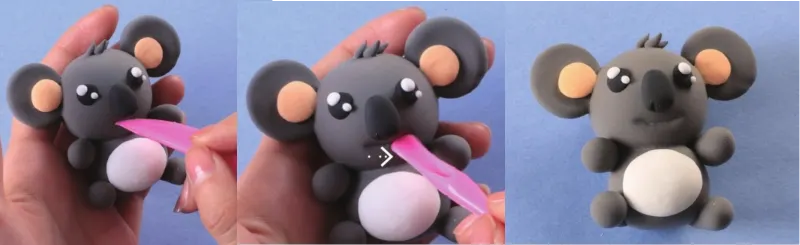
In fact, we can easily make mistakes in this step, or even fall short. A good idea is to practice on other clay a few times before sculpting on the clay koala.
Alternatively, if you’re not used to handling a knife, you can use an old pen to slowly carve out the mouth.
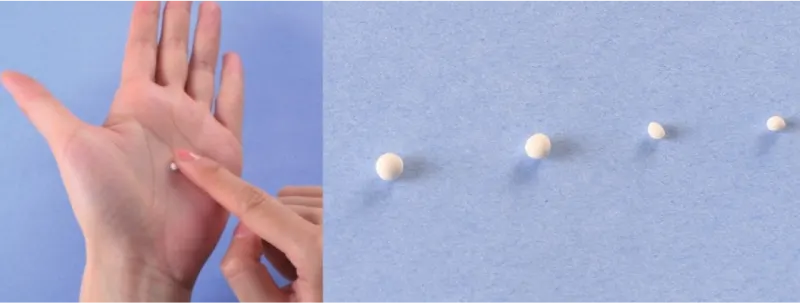
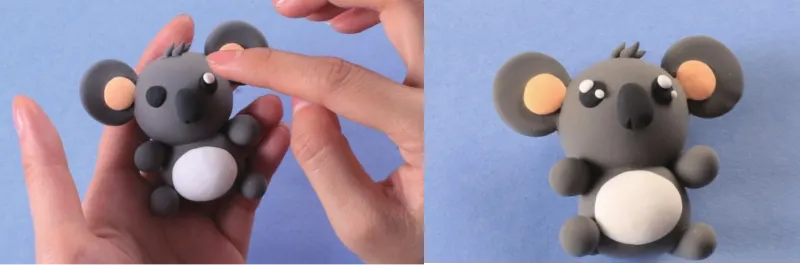
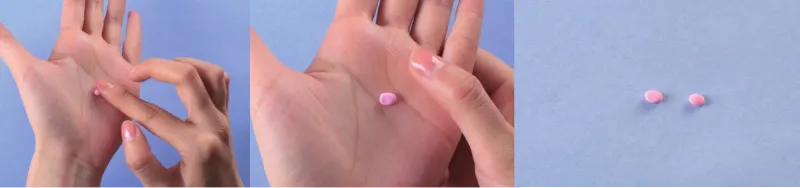
Step 8: Make Blush for Face
OK, now let’s add a little blush to the clay koala. Take a little pink clay, roll it into two small balls, and flatten them.
Apply pink clay to the koala’s face.
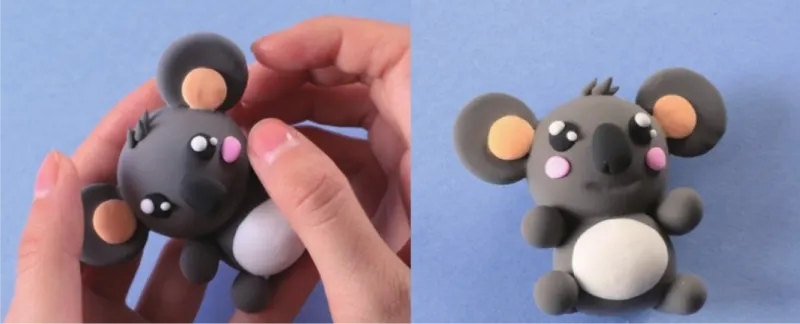
This step is easy. We actually have a cute clay koala at this point. It’s almost done!
Step 9: Make A Leaf
Let’s add a leaf. Take a small piece of cyan air-dry clay and shape it into droplets. We then slightly flattened one side of the droplet to make it look like a heart.
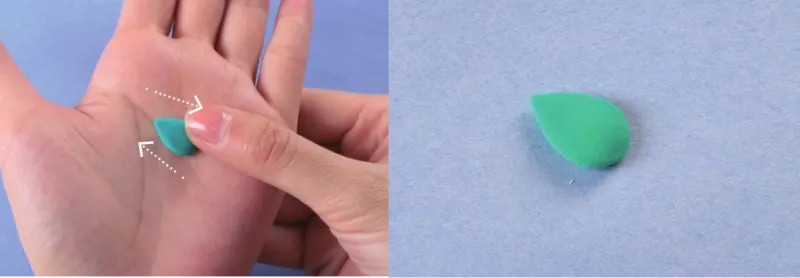
Place the cyan clay flat side up in the palm of your hand and use a knife to cut out the veins on it.
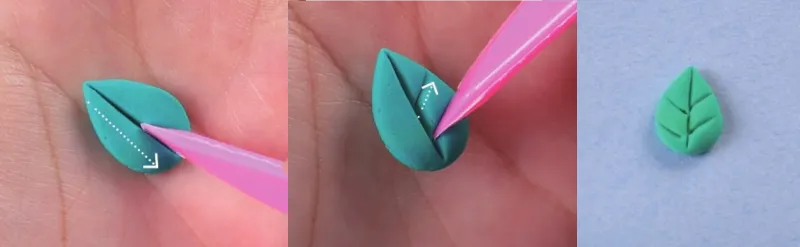
This step is not difficult, you need to control the knife carefully to let it cut the texture you want.
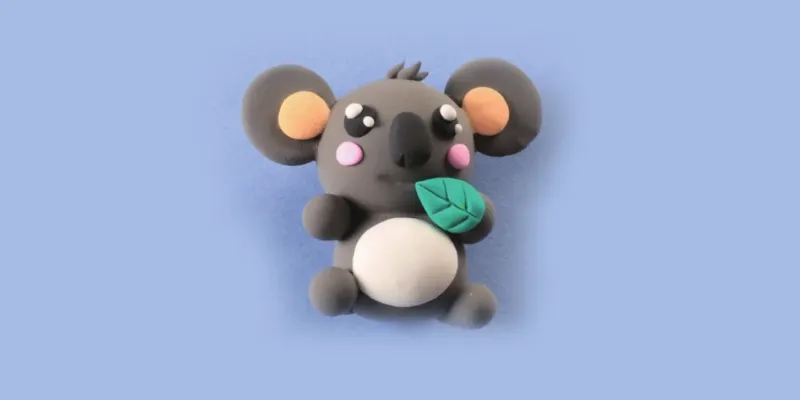
Step 10: Stick the Leaf
Finally, we glued the leaves to one of the clay koala’s hands and we’re done!
You can place the finished clay koala on a cool and ventilated shelf, and it will dry and harden after 24 hours. You can then show it to your family and friends!
Tips to Store Clay Koala
In fact, if you want the air-dried clay koala to last for a long time, you need to have reasonable storage methods.
Avoid Strong Winds
You should know that air-drying clay is very light, especially when dry. The water in the clay evaporates, making it less massive. Strong winds will blow it away.
Therefore, clay koalas should be stored in a location free from strong winds. And try not to let it stay high. Even though it’s light, the gravity acceleration of a high drop can cause it to break.
Avoid Sunshine
Air-dry clay contains food coloring, which is what makes it colorful. However, most food colorings are not UV resistant. Clay koala may fade if left in the sun.
Therefore, you should keep it in a cool place out of direct sunlight as much as possible.
Avoid Moisture
Water will soften air-dry clay again. So, keep your clay koala away from damp rooms, such as kitchens and bathrooms.
Best Idea: An Acrylic Box
Placing the clay koala in an acrylic box is best.
First of all, it is transparent, which will not affect the display of crafts. Secondly, it is sealed to prevent air and water from entering. Finally, the acrylic box will protect the clay koala from damage by pets or other external forces.
Some acrylic boxes also filter UV rays, so you can safely place your clay koala on your balcony or in your yard!
Read More >> Store Air Dry Clay for Maximum Shelf Life
Does Clay Koala Need to be Baked
No, you don’t need to and can’t bake clay koalas. Air-dry clay will dry naturally anywhere, all you need to do is wait 24 hours.
Read More >> How Long Does Air Dry Clay Take to Dry
In fact, the surface of a clay koala will dry out within a few hours in a well-ventilated area. Using a dryer or fan can dry clay koalas safer and faster.
If you put air-drying clay in the oven, the heat may ruin your work. Likewise, putting a clay koala in the microwave is a mistake.
Conclusion
In this tutorial we create a clay koala in ten steps. Whether you’re a beginner or an experienced crafter, you can follow this step-by-step tutorial to create an adorable koala.
It’s easy to find air-drying clay in stores because it’s the most popular creative toy these days. Not only children, but also adults love its soft and light texture. People use it to create all kinds of crafts, and in classrooms, students’ clay ideas fill the shelves.
You can read on for our clay projects for kids: