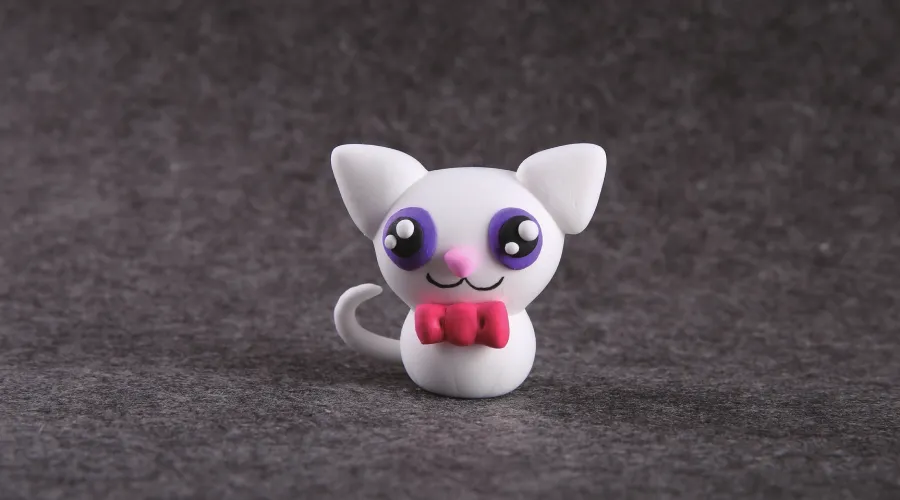
Cats conquer the world with their cuteness! Air-drying clay allows you and the kids to have more cats! They can be placed on the table, windowsill, bookshelf, etc., making our home more dynamic.
Below is a DIY clay art tutorial for our kids to make a clay cat step by step. It’s easy, pick up the clay and let’s play!
Prepare materials
We need 5 colors of clay: white, purple, pink, black and rose. Since our cats are white, more white clay will be needed.
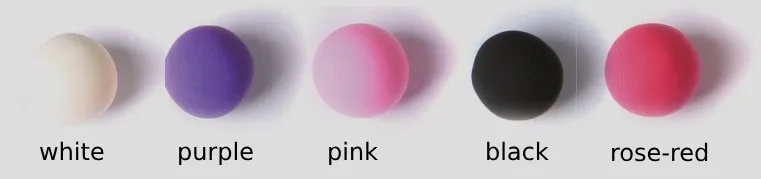
If you want to make a cat of another color, you can replace the white clay with the corresponding color.
How to Make a Clay Cat Step-by-Step
We’ll walk you through some easy steps and pictures to make an air-dry clay cat. Kids and beginners alike can learn to make clay crafts with our tutorials.
Step 1: Make the Clay Cat’s Head and Body
First, we divide a ball of white air-dry clay into 5 parts. Two large ones and three small ones. We will use the larger parts to make the cat’s body.
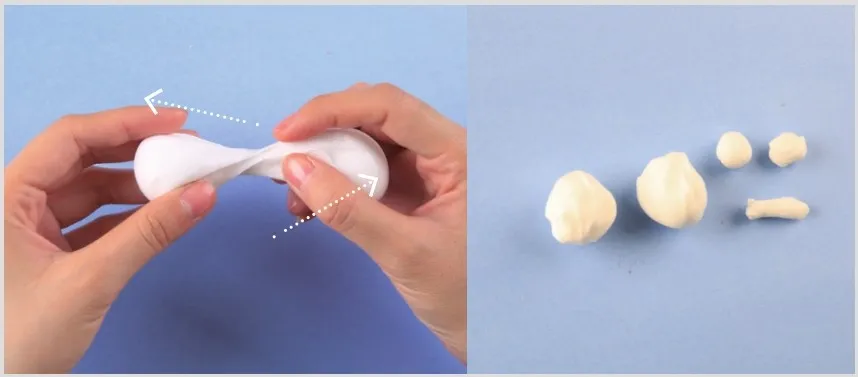
Next, we knead two large portions of clay into balls. Notice that the two clay balls are different sizes. Then stick the two clay balls together like a snowman.
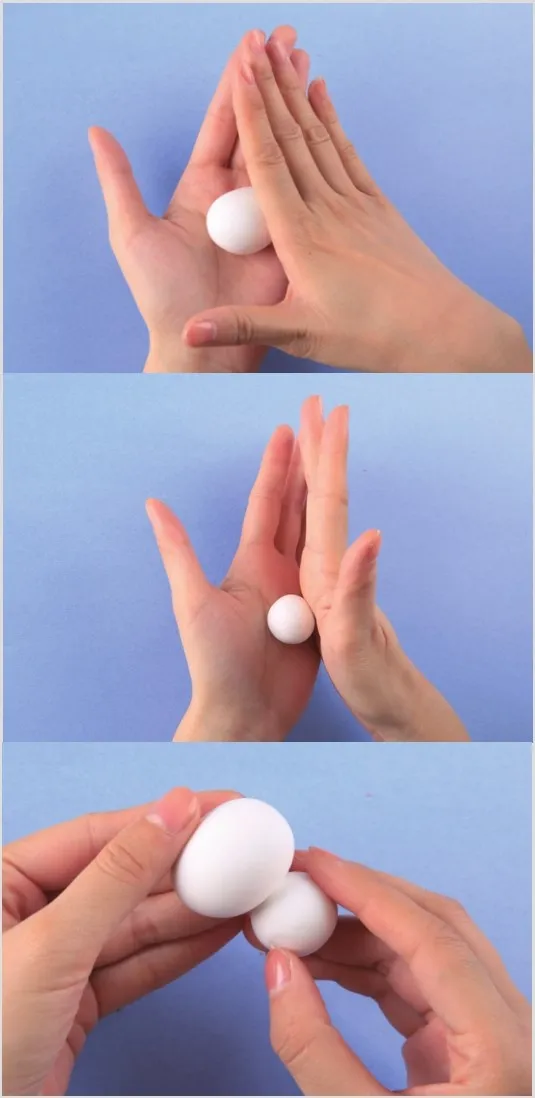
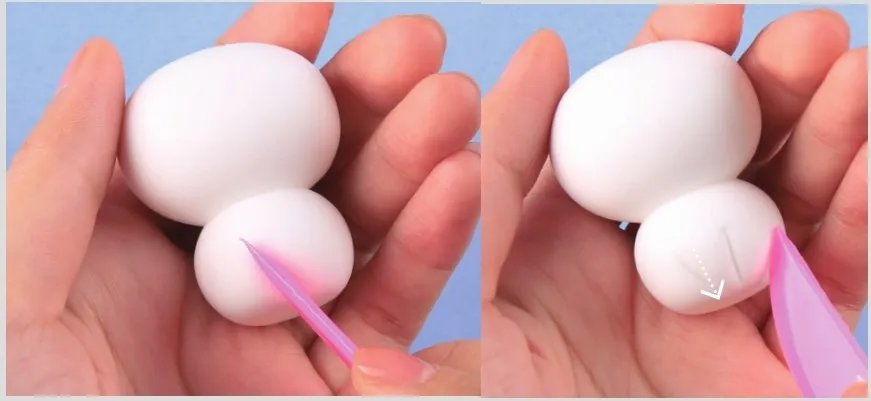
Use a plastic knife to stamp three lines into the small clay ball. These are the cat’s legs.
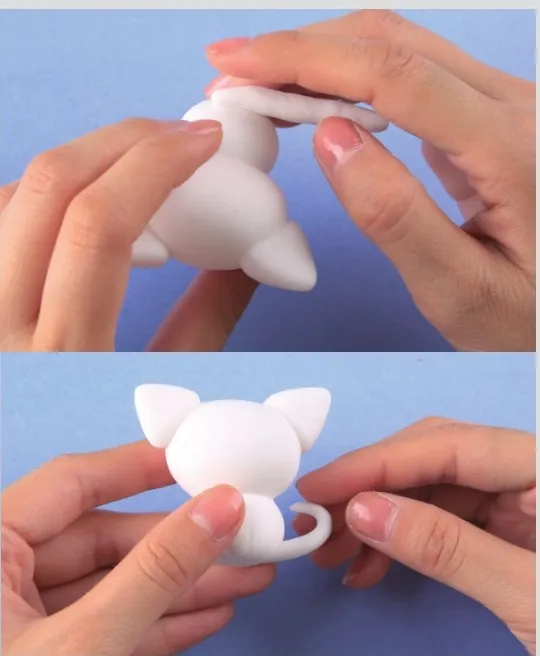
Step 2: Make the Clay Cat’s Ears
Take two small balls of clay and knead them into small balls. Use your fingers to shape the balls into a triangle.

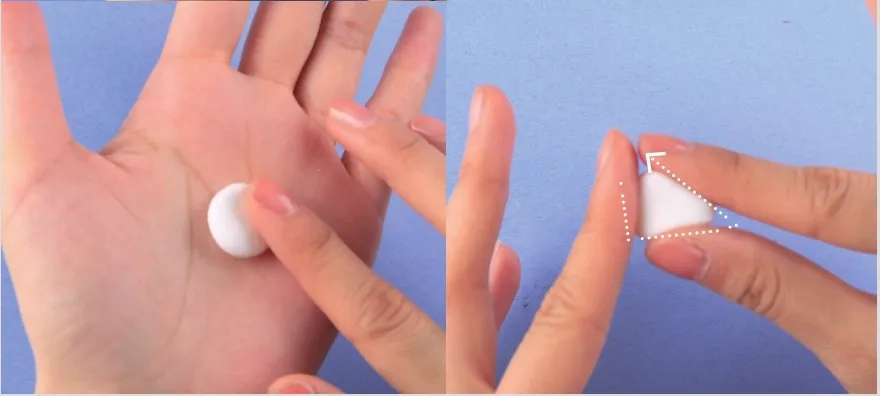
When pinching the cat’s ears, first flatten the clay ball with your fingers, and then press the edge with your index finger and thumb to make the cat’s triangular ears.

Place the triangular ears on the previous cat’s head (the big round ball is the cat’s head).
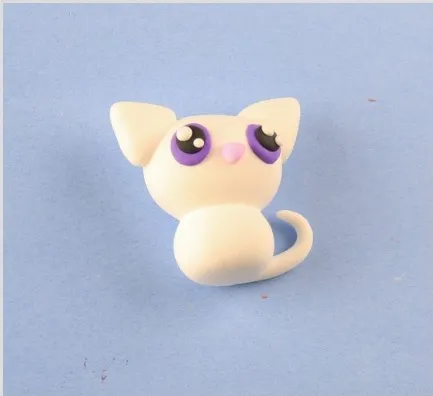
Step 3: Make the Clay Cat’s Tail
Roll the remaining small portion of white clay into a stick shape and glue it to the cat’s body (the small round ball is the cat’s body). Be careful not to cover the legs.
Once it’s glued, you can hold the other end and bend it slightly to make it look like a cat’s tail.
We have made the shape of the cat, now we will make the cat’s eyes and nose.
Step 4: Make the Clay Cat’s Nose
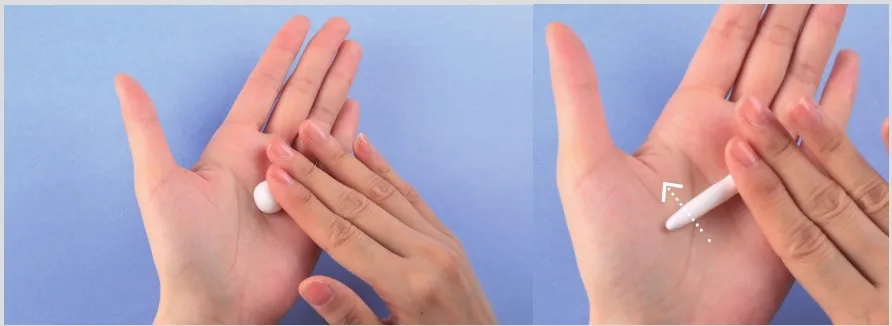
We use a little bit of pink air-dry clay to create the cat’s nose. Roll the clay into a very small ball and press it into a triangle with your fingertips.
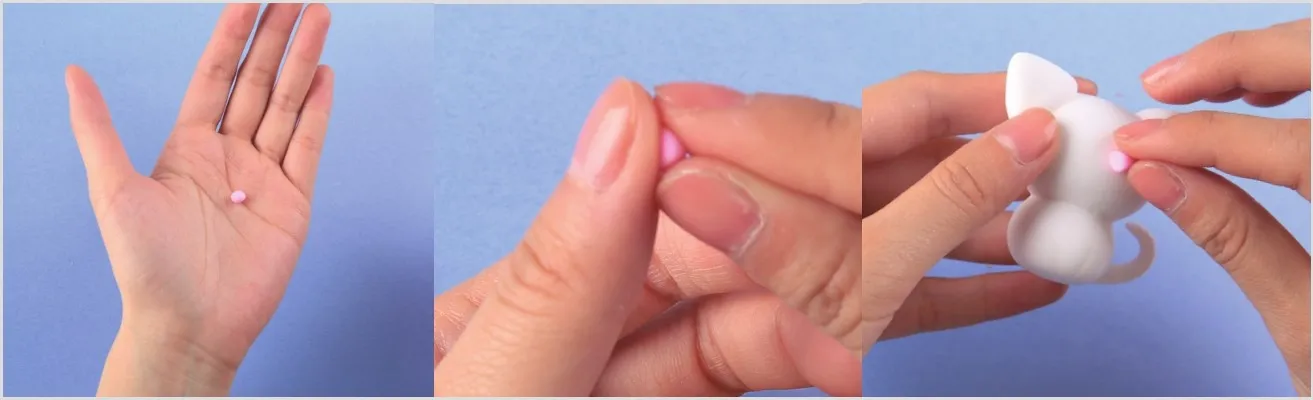
Then, we put the small pink nose in the middle of the cat’s face.
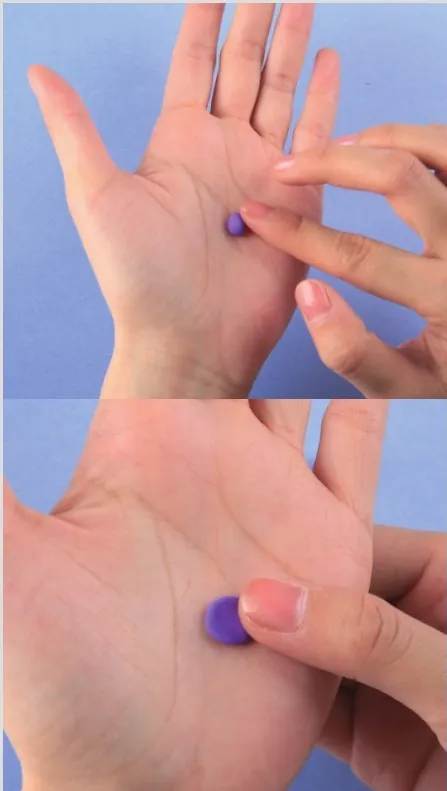
Step 5: Make the Clay Cat’s Eyes
We take a small amount of purple clay, roll it into two small balls, and flatten them with our thumbs.
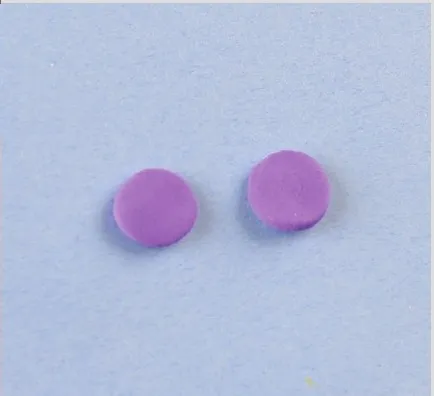
Make two more black eyes. We take less black clay than purple clay and roll it into two small balls. Likewise, we flatten them.
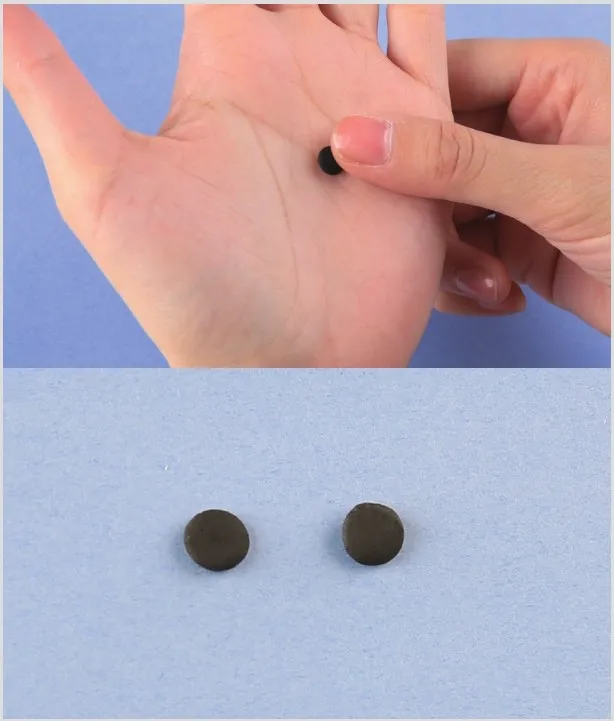
We first stick the purple clay above the cat’s nose, and then stick the black clay in the middle of the purple clay. Note that the black clay cannot cover the purple clay, so when making, use a little less black clay.

Next, we add a little shine to the eyes. Take a little bit of white clay, roll it into 4 small balls, and flatten them slightly.
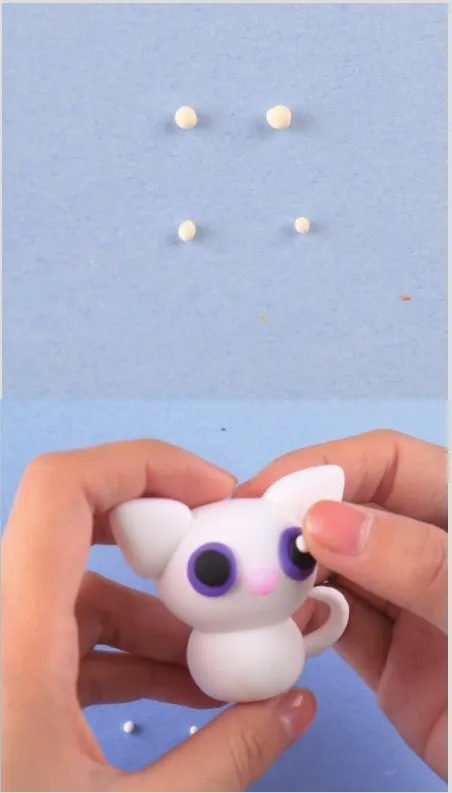
Place the white clay balls over the cat’s eyes. This way, our clay cat looks cute.
Next we put a beautiful bow on the clay cat.
Step 6: Make a Beautiful Clay Bow
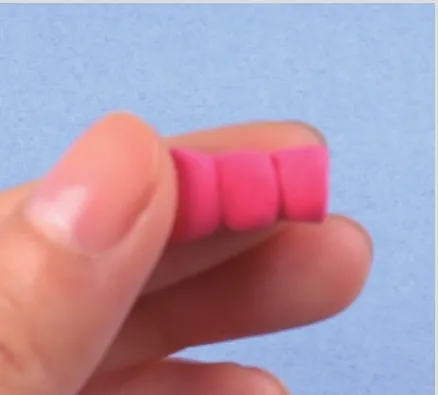
We used rose red air-dry clay to make the cat’s bow. First, dig out 3 small balls of clay and knead them into 2 drop shapes and a short cylinder shape.
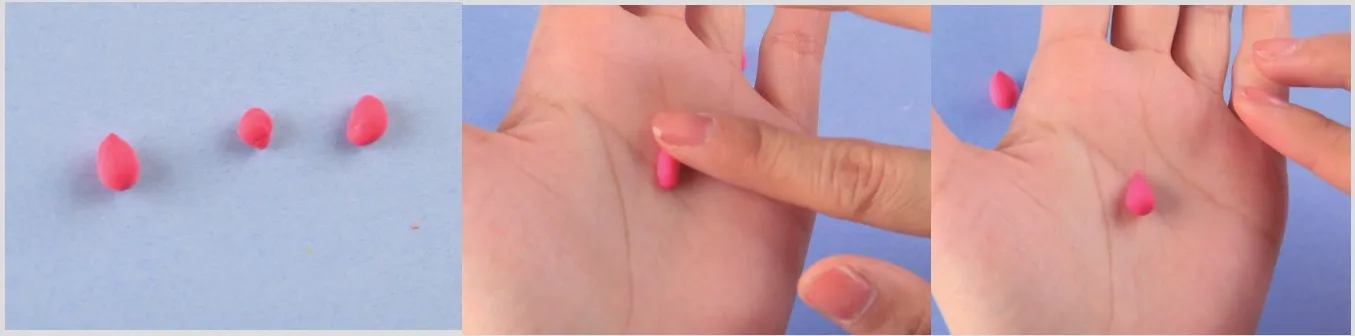
Next, glue the two water drops and cylinder together to form a butterfly shape.
Use a tool to poke a small hole in the drop-shaped clay to create a bow.
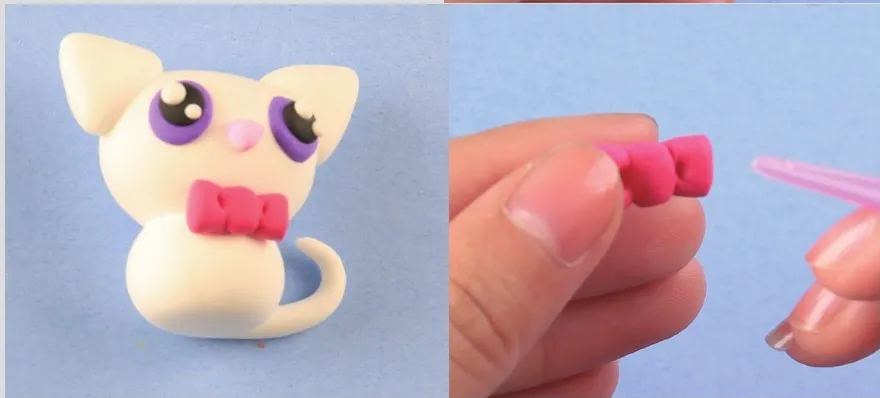
Finally, we stick the bow to the neck of the clay cat. Of course, don’t forget to draw the mouth with a pen.

Finish! Is it adorable?
Conclusion
The steps to make a clay cat are not difficult and any child can complete it.
Air-dry clay is suitable for making crafts. It is not only light but also safe. Because it does not require high-temperature heating to dry and harden. Cats made of air-dry clay can be stored for a long time as long as they are placed in a ventilated and moist place.
If you are interested in clay art, you can also continue reading our tutorials to make more exciting crafts.

Easy DIY Cute Octopus Tutorial