Green plants always make people feel refreshed. Many clay enthusiasts like to make plants, such as cacti and succulents. It’s actually very easy to DIY a clay cactus. Below is the clay cactus DIY craft tutorial we compiled, take a look!
Prepare Materials
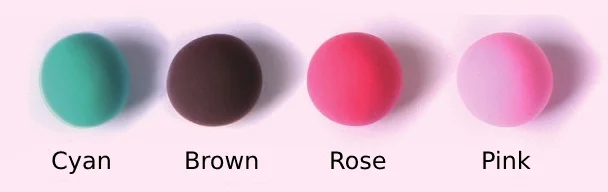
You only need to prepare 4 colors of air dry clay: cyan, brown, rose red, and pink.
Next we will make the clay cactus step by step.
Air Dry Clay Cactus DIY Tutorial
The key to making a clay cactus is the pot and cactus trunk. We will also break it down step by step when introducing the tutorial. Kids can easily learn to make a clay cactus by following the tutorial.
Before you start, if your air dry clay is a little stiff, spray it with some water. After a period of kneading and stretching, air dry clay will regain its softness.
Step 1: Prepare rose air dry clay to make flower pots
Let’s make the cactus pot first. First, take a ball of rose-red air dry clay and knead it into a flower pot shape that is wide at the top and narrow at the bottom.
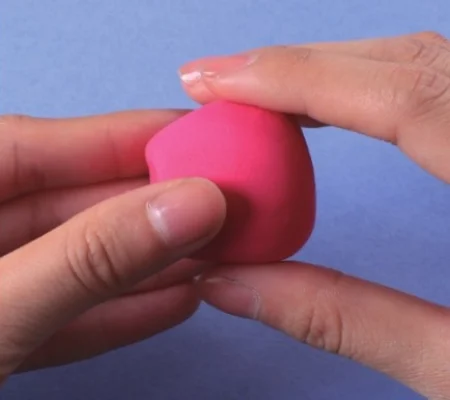
The top of the flower pot only needs to be slightly sunken, no need to hollow it out.
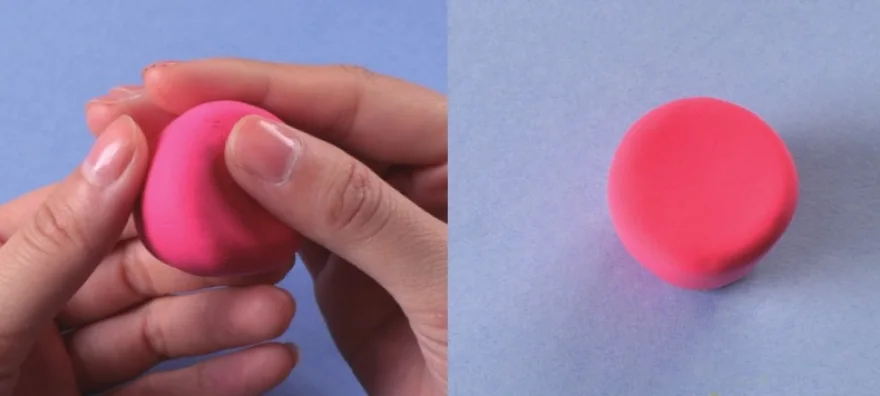
It doesn’t matter if it doesn’t look like a flowerpot now, we’ll decorate it in a later step.
Step 2: Prepare brown air dry clay to make soil
In this step, we will make the soil in the flower pot. Take brown air dry clay and roll it into a ball first.
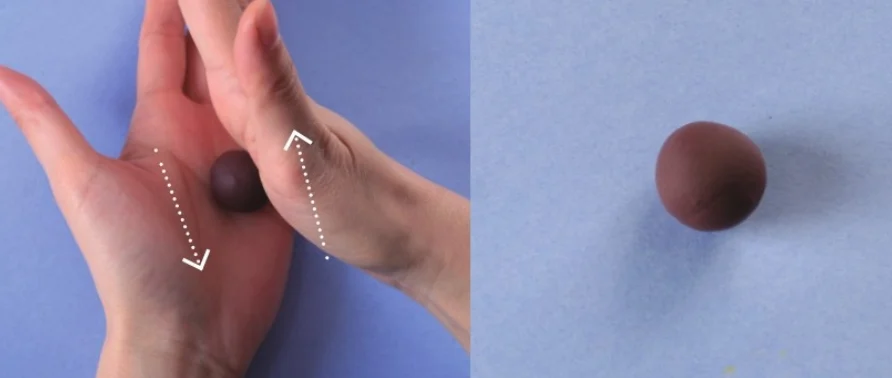
Note that the brown clay should not be larger than the flower pot.
Step 3: Stick the brown air dry clay to the flower pot
Flatten the ball of clay with the palm of your hand. During this process, your hand can move forward and backward. The final shape of the clay is not flat, but like Dorayaki, with a raised center and flat edges.
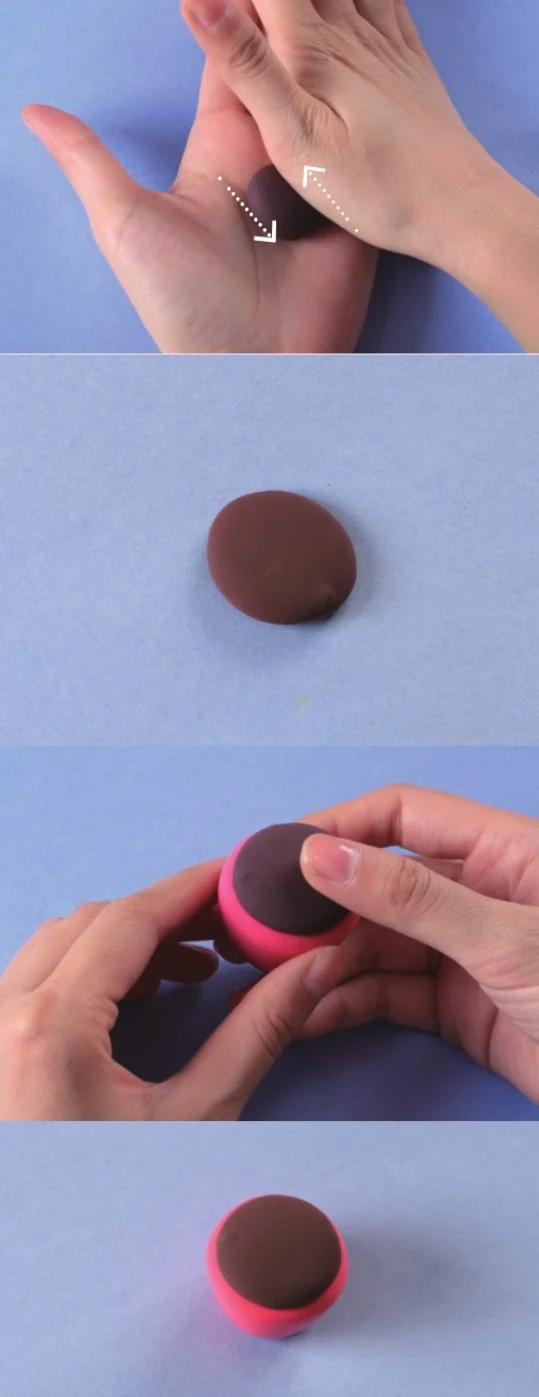
Cover the pot with prepared soil. You can pinch the soil higher with your fingers to make it look fuller.
Step 4: Use rose air dry clay to make a long strip
Next, let’s decorate the flowerpot. Take rose red air dry clay, roll it into a round shape and then roll it into a long strip.
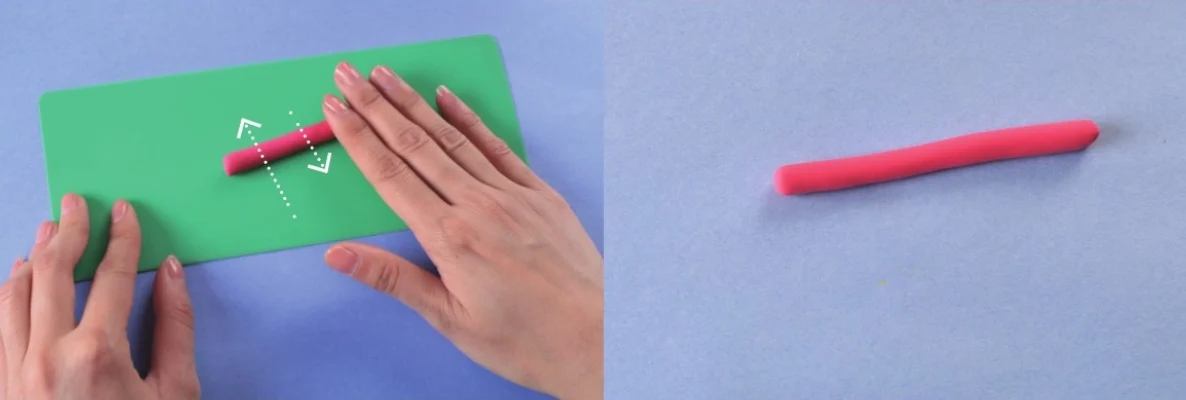
Pay attention to the width when making this strip. About 1/4 of the height of the flowerpot. The length of the strip should be enough to wrap around the top of the flower pot.
Step 5: Stick the strip from step 4 to the edge of the flowerpot
Stick the long strip made previously to the top of the flowerpot as shown.
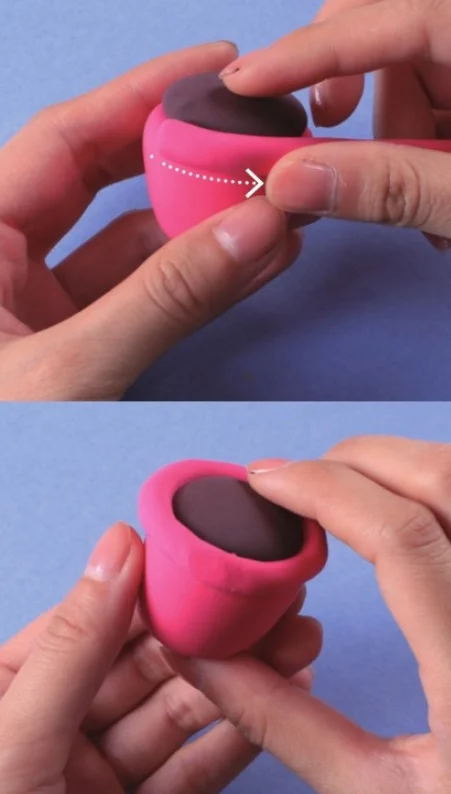
Use your fingers to pinch the joints of the long strips evenly without leaving any gaps.
Step 6: Use a plastic knife to cut out the texture
Use a plastic knife to cut equally spaced stripes around the edge of the pot.
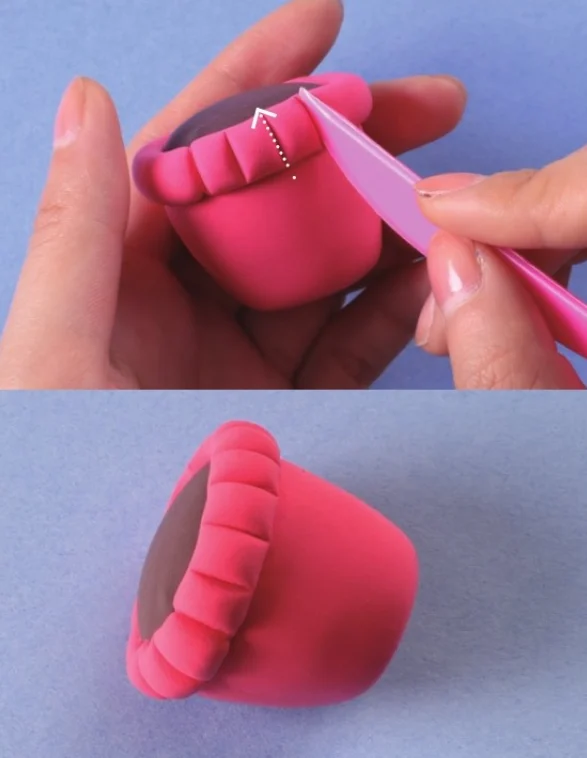
You can also carve different patterns according to your own ideas.
Step 7: Prepare cyan air dry clay to make the cactus trunk
Next, we make the clay cactus trunk. Take cyan air dry clay, roll it into a ball and press it into a cake shape.
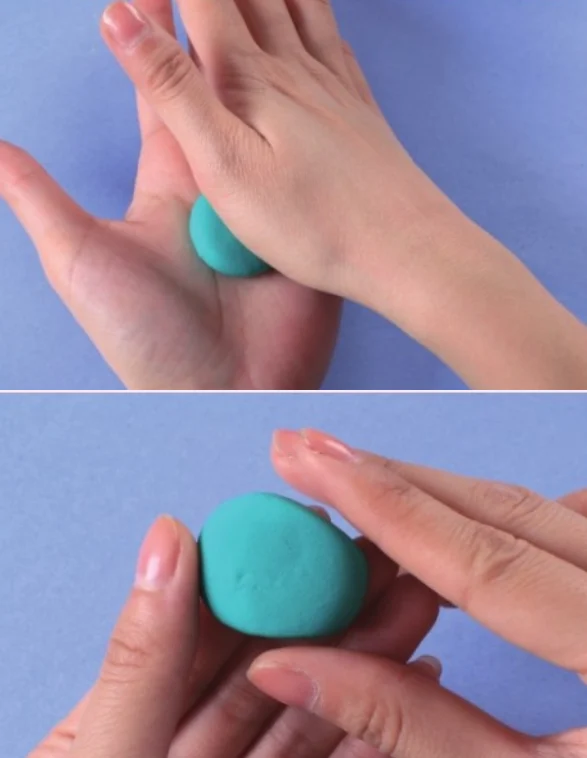
Use your fingers to adjust the shape of the cactus trunk.
Step 8: Stick the cactus trunk from step 7 to the center of the flowerpot
Once you have the cactus trunk ready, stick it to the center of the pot.
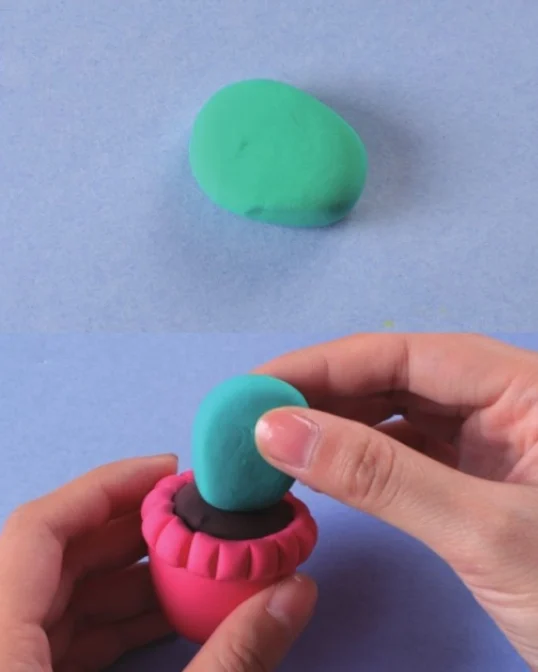
Press one end of the cactus trunk slightly firmly onto the soil in the flowerpot. Wait for a while and they will stick together.
Step 9: Make the second cactus trunk
Take cyan air dry clay and follow the steps above to make a second cactus trunk.
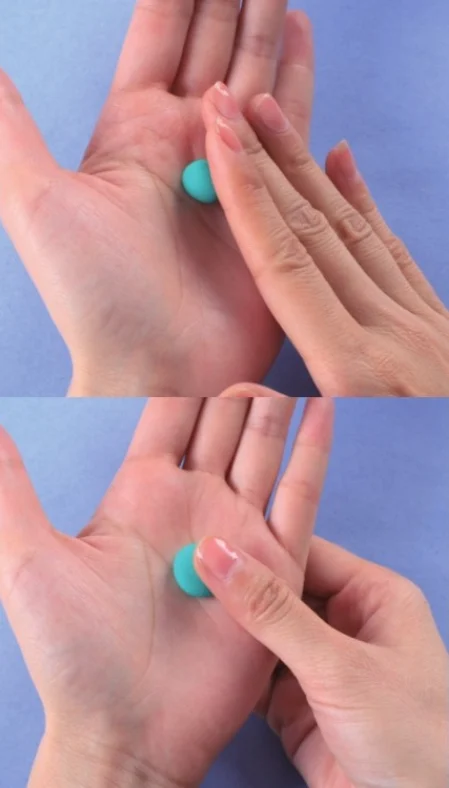
The second piece of cactus trunk should be smaller than the first piece.
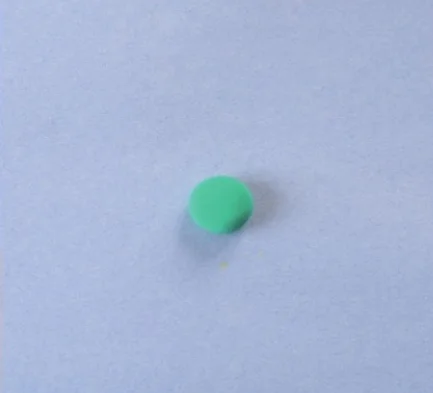
Step 10: Make the third cactus trunk
In the same way, make the third cactus trunk.
Step 11: Stick the clay of steps 9 and 10 to the cactus trunk
Stick the two prepared cactus trunks to the flowerpot. Be careful not to overlap the first cactus piece.
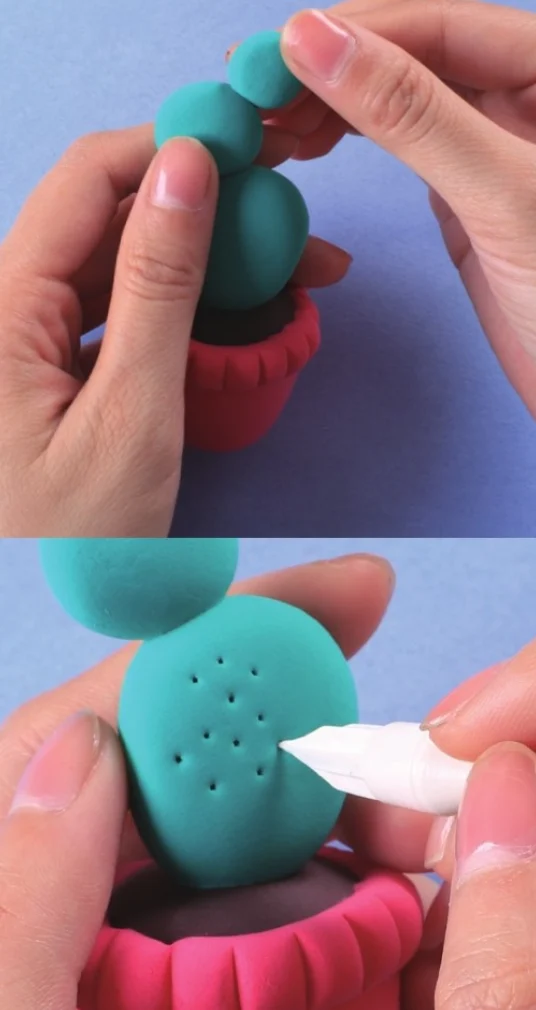
You can use a plastic knife or other tool to poke holes in the cactus. This will make your clay cactus more lively.
Step 12: Prepare pink air dry clay to make cactus buds
Finally, we are going to add some small buds to the clay cactus. Take a small amount of pink air dry clay and knead it into three small balls.
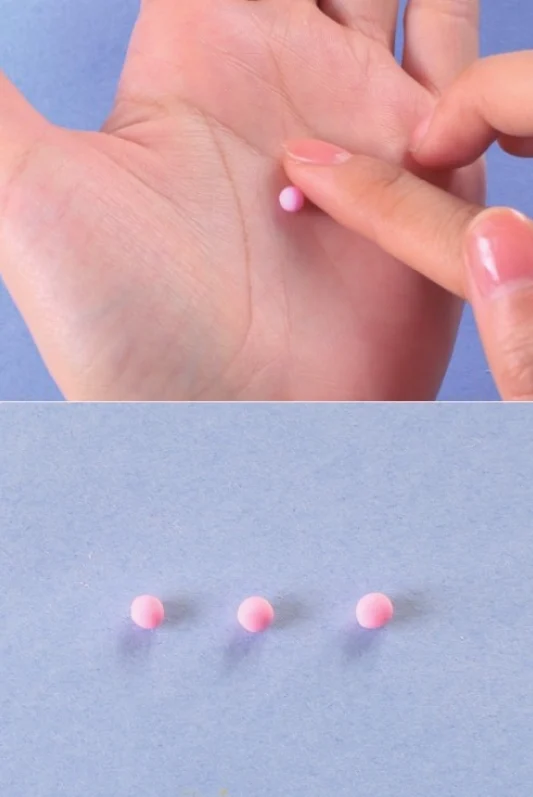
If you want more buds on the cactus, you can knead a few more small balls.
Step 13: Stick the buds from step 12 to the cactus trunk
Stick the small pink balls to the cactus trunk.
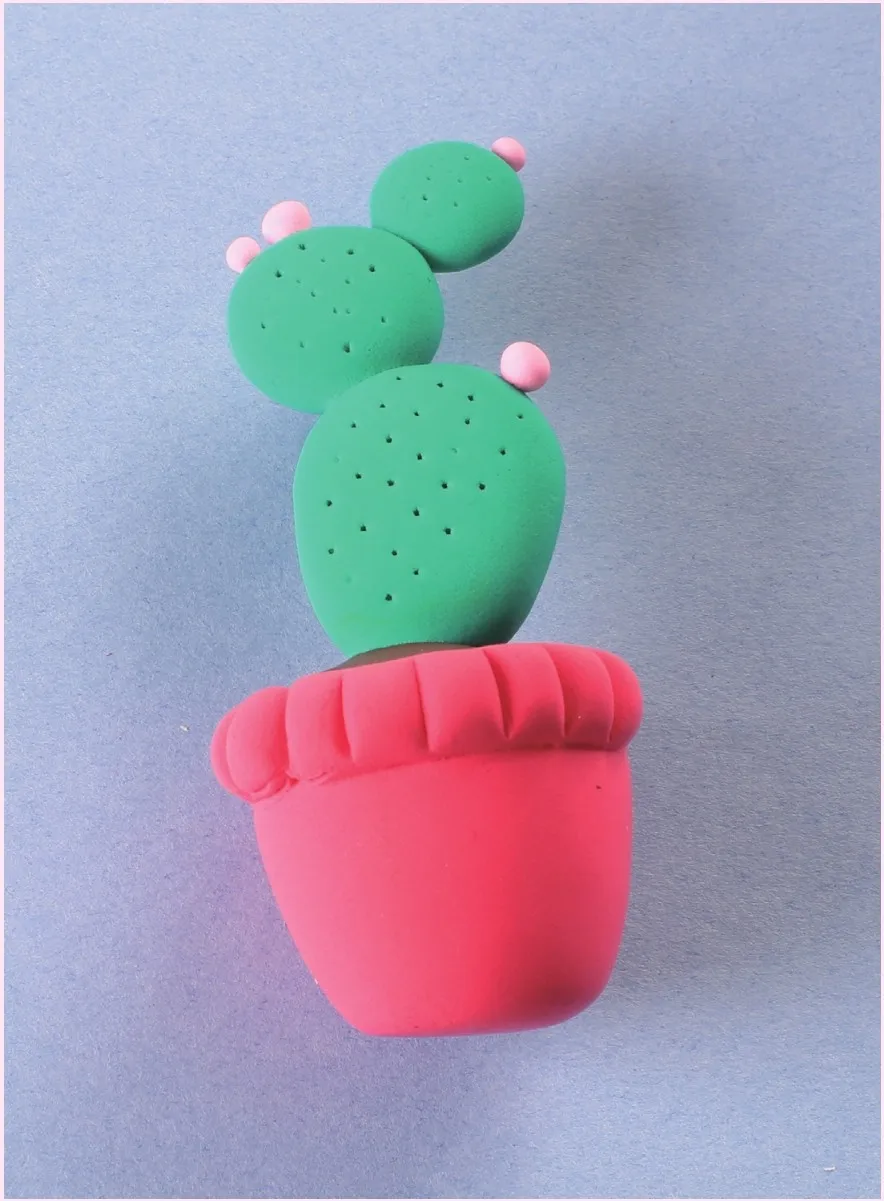
The clay cactus craft is finished! How easy!
Air Dry Clay Cactus DIY Craft FAQs
Maybe you will encounter some questions when making clay cactus, you can find the answers below. If we didn’t cover an issue that interests you, please feel free to contact us.
Does Air Drying Clay Get Hard
The answer is yes. Air dry clay will harden as it dries. And compared with traditional clay, air dry clay is lighter in weight after hardening and is not easy to crack.
After you have made your air dry clay cactus craft, place it on a cool and ventilated table or shelf. The air dry clay surface will dry within 3 hours.
What happens if air dry clay gets wet
Air dry clay will become wet if it comes into contact with water. Next, it will soften.
Air dry clay contains water, so when the water evaporates, it hardens. However, if you expose dried clay to wet, it will absorb the water again and become soft.
Does air dry clay crack in the sun
No, qualified air dry clay will not crack during the drying process.
Although, air dry clay will not crack when dried in the sun. However, we do not recommend that you place your clay craft outdoors. Ultraviolet rays from sunlight can cause clay to fade.
If you want your air dry clay to dry faster, you can use a hair dryer or fan.
Why is my air dry clay so sticky
Under normal circumstances, air dry clay will not stick to your hands or molds. If sticky phenomenon occurs, it may be caused by the following reasons:
- Quality Issues – Substandard air dry clay uses poor materials so that the final product will be sticky. Mildewed air dry clay may also become sticky. These should be thrown away in time to avoid harming the health of children!
- Water – air dry clay becomes soft when exposed to water. When you add too much water to clay during play, it becomes sticky.
- Work surface – Sometimes air dry clay does not stick to your hands but sticks to the table. This is because some work surface materials are rough and easy to stick to clay. You can lay an acrylic sheet on such a work surface.
Can I paint air dry clay
If the final finish of air dry clay is not the color you want, you can paint it.
Unlike traditional clay, today’s air dry clay toys come in many colors. Moreover, new colors can be obtained by mixing different colored clay. Therefore, using air dry clay to make DIY crafts is less paint.
Conclusion of DIY Clay Cactus
Air dry clay is the best material for making clay cactus. Kids can enjoy playing while making clay cactus. At the same time, they can also learn the shape and details of the cactus during play. This helps improve children’s ability to observe and understand the world.
In addition, air dry clay can also be used to make other creative crafts. You are welcome to continue reading our other tutorials:

10 Steps Easy DIY Clay Succulent Tutorial