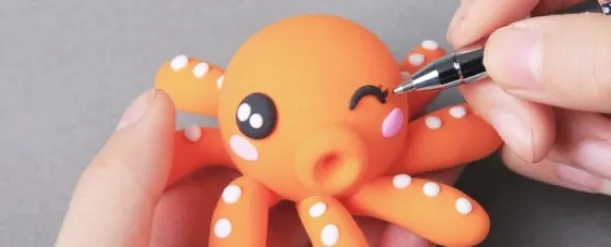
Air Dry Clay Ideas: How to Make a Cute Clay Octopus
This is a tutorial on air dry clay ideas for beginners, where children can make cute octopuses step by step. Come and try it!

New to lightweight clay? Explore must-have tools and beginner-friendly techniques. What amazing creations will you start with today?
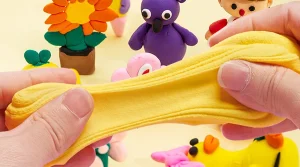
Lightweight clay is a soft, pliable material often used in crafting and modeling. It’s known for its lightness, as the name suggests, making it easy to handle and shape. This clay is perfect for creating everything from small charms to larger sculptures because it maintains its form well while remaining soft to the touch.
Unlike other clays, lightweight clay is air-drying, which means you don’t need a kiln or oven to harden it. Once exposed to air, it gradually becomes solid, preserving the artist’s creation without the need for extra equipment.
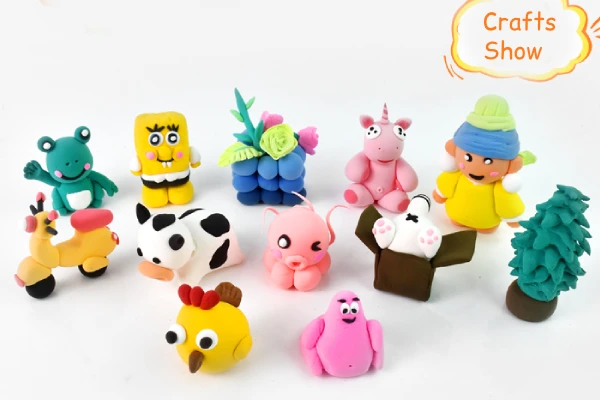
Imagine a child crafting a miniature garden with tiny flowers and a little pond. The lightweight clay would allow them to mold these intricate details without the figures collapsing under their own weight. This is why lightweight clay is so popular in both classrooms and homes; it offers endless possibilities for creative expression while being incredibly easy to use.
There are many reasons why lightweight clay stands out as a top choice for crafting, especially for beginners.
Because it’s so light and soft, even young children can shape and mold it without much difficulty. This user-friendly nature makes it ideal for those just starting in the world of clay modeling.
Compared to other types of clay, such as polymer clay or playdough, lightweight clay offers distinct advantages. Polymer clay, for example, requires baking to harden, which might be a step too far for those who just want to experiment without worrying about extra tools. Lightweight clay is easy to work with like playdough but dries into a durable form like polymer clay.
Another significant benefit of lightweight clay is its eco-friendly and non-toxic properties. Parents and teachers can feel confident that this material is safe for kids to use, and since it doesn’t require baking, it’s also energy-efficient. Plus, because it’s so light, you can use it to create larger models without them becoming too heavy or cumbersome.
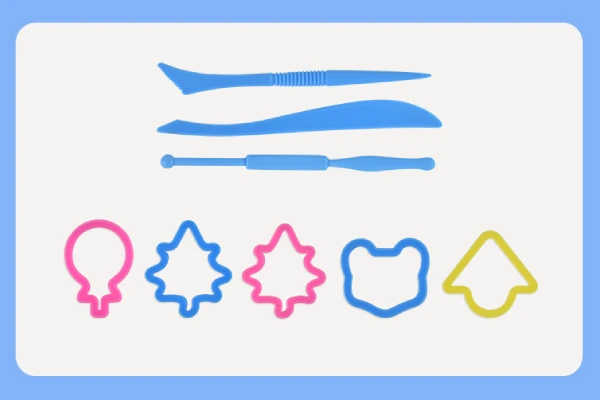
When starting with lightweight clay, having the right tools can make all the difference. Basic sculpting tools, such as knives, needles, and loop tools, are essential for shaping and carving the clay.
Rolling pins and mats are also key. Rolling out lightweight clay evenly is crucial for making flat shapes or prepping it for more intricate designs. A simple rolling pin, paired with a non-stick mat, helps ensure the clay doesn’t stick to the surface, making it easier to lift and mold. This setup is perfect for creating things like flat ornaments or layered pieces where consistency is key.
Texture tools and stamps add another layer of creativity. They allow beginners to imprint patterns or textures onto the clay, giving it a more professional look. Imagine crafting a tiny clay leaf and using a stamp to add realistic veins—it’s these small details that can make a project truly stand out.
As beginners grow more comfortable with lightweight clay, they might want to explore more advanced tools to expand their skills. Clay extruders and cutters are perfect for this.
An extruder can press clay through different-shaped discs, creating long, uniform strands that can be used for detailed work like hair or intricate patterns. Cutters, on the other hand, are great for making precise shapes, from simple circles to more complex designs.
Specialty tools for fine details, such as small carving tools or tiny brushes, help bring a creation to life. These tools allow crafters to add intricate details like facial features on a miniature figurine or delicate petals on a flower.
Molds and shaping tools can also elevate a project. These tools are used to create consistent shapes quickly, which is especially useful when making multiple identical pieces, like beads or buttons.
Creating with lightweight clay is not just about having the right tools—setting up an ideal workspace is equally important. A well-organized and comfortable workspace can make crafting more enjoyable and help prevent mistakes.
The workspace should be clean, flat, and free of clutter, with plenty of light to see the details of the project. A non-stick mat is useful to keep the clay from sticking to the work surface, making it easier to lift and shape.
Picture a family working together on a weekend craft project. They’ve cleared off the kitchen table, laid down a mat, and gathered their tools. The kids are excited to make their first lightweight clay sculptures, while the parents help guide them through the process, making sure everyone is having fun and staying safe.
This kind of setup not only makes crafting more efficient but also more enjoyable, allowing everyone to focus on the creative process without worrying about the mess or safety hazards.
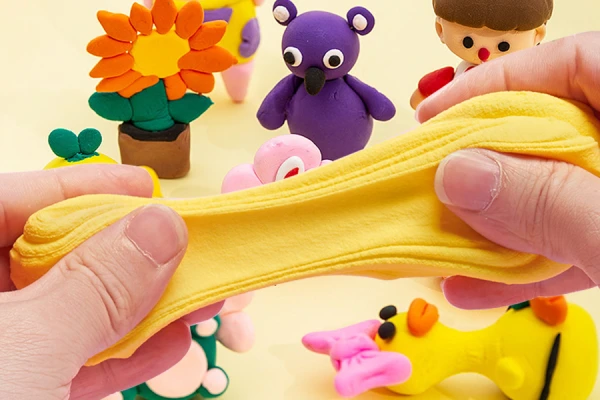
Before diving into any project with lightweight clay, it’s important to condition and prepare the clay properly. Conditioning is simply the process of softening the clay to make it easier to work with. Since lightweight clay is already soft, it doesn’t require much effort to condition, but it’s still a good idea to knead it gently with your hands.
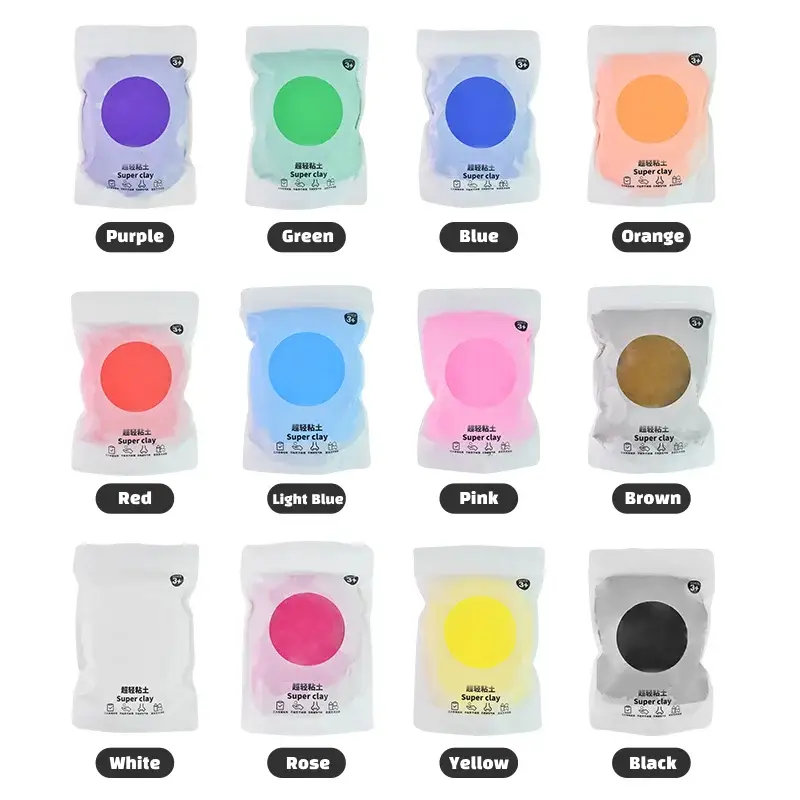
Mixing colors is another fun part of working with lightweight clay. The clay comes in a variety of colors, but sometimes you might want a specific shade that’s not readily available. You can easily mix different colors together by kneading them until they blend into a uniform color. You can also add pigments or paints to the clay to create custom shades.
Once the clay is conditioned and ready, it’s time to start sculpting.
This involves taking a small piece of clay and pinching it between your fingers to shape it. It’s a simple yet effective way to create basic forms like bowls or tiny animal faces. Lightweight clay’s softness makes it particularly easy to mold this way, so even those with little experience can create smooth, even shapes.
Coiling involves rolling the clay into long, thin strands and then spiraling or stacking them to build up forms. This method is perfect for creating shapes like pots, vases, or even limbs for figurines. With lightweight clay, the coils stick together easily, which is great for beginners who might struggle with more stubborn materials.
Creating basic shapes like spheres, cylinders, and cones is another essential skill. These shapes are the building blocks for more complex designs. For instance, to make a simple snowman, you would start by forming three spheres of different sizes. Joining these pieces together is easy with lightweight clay; just press them gently, and they’ll adhere without much effort.
Adding texture and details to your clay creations can bring them to life. There are many ways to do this, depending on the effect you want to achieve. For instance, using simple tools like a toothpick or a needle, you can create lines, dots, and other patterns on the surface of the clay.
Embossing and imprinting are also popular techniques. By pressing objects like stamps, lace, or even textured fabrics into the clay, you can transfer patterns onto its surface. This technique is especially useful for making jewelry or decorative tiles.
For example, a beginner might press a piece of lace into lightweight clay to create a beautiful, intricate design on a pendant. The clay holds these impressions well, and once it dries, the pattern remains crisp and defined.
For those ready to take their skills to the next level, lightweight clay offers plenty of opportunities to explore more advanced techniques. Building complex structures is one way to challenge yourself. This might involve creating multi-layered designs, such as a detailed landscape with hills, trees, and animals.
Lightweight clay is ideal for this because it’s light enough to build up without becoming too heavy, yet firm enough to hold its shape.
Creating figurines and detailed models is another step forward. Beginners who have mastered basic shapes can start experimenting with more intricate forms, such as human figures or animals. Lightweight clay’s forgiving nature means that if a piece doesn’t turn out quite right, it’s easy to reshape and try again. This makes it a perfect medium for learning and experimenting.
Imagine a hobbyist crafting a miniature garden with a detailed stone pathway and tiny flowers. They might start by using molds to create uniform stones and then arrange them carefully on a clay base. Each piece fits together seamlessly, thanks to the lightweight clay’s easy-to-use properties. The result is a beautifully detailed scene that looks complex but was simple to create with the right techniques.
Drying lightweight clay properly is crucial to ensure that your creations maintain their shape and integrity. Most lightweight clay is designed to air-dry, which means it hardens naturally over time when exposed to air.
Air drying is simple and requires no extra tools; just place your clay project in a well-ventilated area and let it dry. The drying time can vary depending on the size and thickness of your piece. For smaller items, it might take 24 hours to dry completely. Larger projects may need a longer time.
It’s important to ensure good airflow around the clay to prevent it from drying too slowly, which can lead to issues like warping or uneven drying.
Working with lightweight clay can be a rewarding experience, but it’s not without its challenges.
One common issue is cracking and shrinking, which can happen if the clay dries too quickly or unevenly. To prevent this, make sure to dry your creations in a well-ventilated area at room temperature, avoiding direct sunlight or heat sources.
If you notice any cracks forming as the clay dries, you can smooth them out with a damp brush before the piece is completely hardened. Lightweight clay’s flexibility helps to minimize these issues, but keeping an eye on the drying process can make a big difference.
Lightweight clay is forgiving and can be easily reshaped while it’s still soft. You can add more clay to correct mistakes or smooth out areas with a damp sponge. If the clay is already dry, you might need to use some fine sandpaper to fix imperfections or add more clay and let it dry again.
To enhance the durability of your projects, apply a clear acrylic sealant once your piece is fully dried. This protective layer helps to guard against everyday wear and tear, preserving your creation’s appearance and strength over time.
If you’re new to working with lightweight clay, starting with simple projects can be a great way to build your skills and confidence.
This is a tutorial on air dry clay ideas for beginners, where children can make cute octopuses step by step. Come and try it!

DIY clay succulents are wildly popular. Now we compile detailed the steps so that our kids can use air dry clay to make cute succulents!

The ultimate DIY air dry clay cactus tutorial is here! Really easy! Make cute clay crafts step by step! Kids and adults should give it a try!

You may not have imagined that air dry clay can create beautiful and delicious ice cream! It looks just like the real thing! Come and try it!

The cakes are so beautiful that you can’t put them down! Here’s a clay cake tutorial that kids can do! Teach you how to make it step by step!

Air-dry clay is the easiest medium for kids to enter the world of art. Making mini pizzas out of clay is a wonderful idea, come and try it!

A practical guide to the best colored air-dry molding clay—covering texture, color quality, durability, and child-safe materials.
A practical guide on pre-colored air dry clay safety, including potential risks, handling tips, and ensuring safe creative play for children.
Air dry clay made easy: practical miniature-making advice for smoother sculpting, safer handling, and more durable tiny designs.
Expert insights on choosing the best clay for miniature figures, highlighting polymer, air dry, and modeling clays for creative and detailed projects.