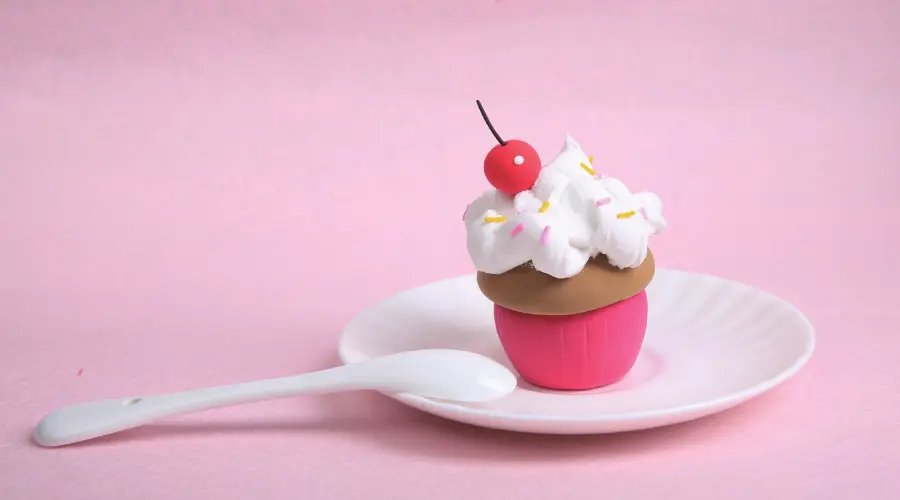
Lovely cakes are attractive. Today, we will use air dry clay to make a cream cake! Trust me, this will be a fun and challenging experience that no kid would want to miss!
Follow our tutorial below to make a clay cake step by step!
Material preparation
We need 6 colors of air dry clay: white, brown, rose, yellow, red, and pink. You can buy clay in these colors at children’s stores.

Please note that we recommend using air dry clay for DIY crafts. They can dry and harden at room temperature, allowing for prolonged storage. They are also sometimes called super light clay.
Make Air Dry Clay Cake Step-by-Step
Our clay cake can be divided into three main parts: cup, cake, and cream. We’ll start with easy clay cups and cakes. There is no doubt that the cream part is challenging and we will finish it at the end.
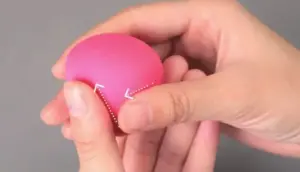
Step 1: Use rose-colored air dry clay to make the cup for the cake
First knead a piece of rose-colored air dry clay into a ball. Then flatten it slightly with the palm of your hand. Note that we don’t need to press it into a pancake shape.

Then, we use our fingers to shape it into a cylinder with a big top and a small bottom. Here we can imagine the shape of a cup. You can also use a cup as a reference.

Step 2: Use a plastic knife to carve the clay cup
Hold the cup with one hand and a plastic knife with the other hand and gently press out lines on the surface of the cup. The blade of the knife is pressed onto the clay from top to bottom to create a straight line.

Rotate the cup as you carve the lines, making sure each line is the same distance apart.

When the cup rotates once in your hand, you can stop carving lines.
Step 3: Make the color of the clay cake part
We used a mixture of three colors of air dry clay: white, yellow, and brown to create the color of the cake.

Mix the three colors of clay and knead it while stretching. This will mix the color of the clay evenly and end up with a coffee color.

Step 4: Make the cake with coffee-colored clay
First, knead the prepared coffee-colored clay into a ball. Then squeeze the ball of clay between your hands to shape it into a pancake shape as much as possible.


Use your fingers to adjust its edges so it looks like a beret.

This step requires a little imagination on our part, as well as some patience and care.
Finally, stick the finished cake to the previous cup. Press lightly with your fingers for a while to make them stick together firmly.

Step 5: Use white air dry clay to make cream
This is the more difficult step. We first take a ball of white clay, hold the two ends of the clay with our left and right fingers, and gently pull it apart.

Rotate the clay back and forth with your fingers while stretching it.

The resulting clay will look like fluffy butter after being stretched and rotated multiple times.

Step 6: Stick the clay cream on the previously made cake
This step requires our focus and patience. Hold the cake cup with one hand and glue the stretched buttery clay onto it with the other hand.
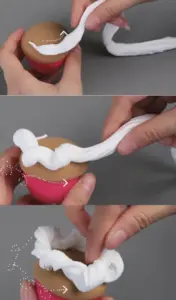
Note that during this process, our fingers need to guide the clay to turn and form a cloud-like shape.

You can recall what a butter cake looked like, which is a highly effective brain exercise. By playing with air dry clay, children can develop good habits of concentration and seriousness. They will pay more attention to details in their lives and studies.
Finally, as you apply the creamy clay to the cake in circles, squeeze the clay between your fingers and twist it to break it.

When you complete this step, you are not far from success! Give yourself a little pat on the back, your clay cake is already great!

Next, we’re going to add some decorations to it to make it look more palatable.
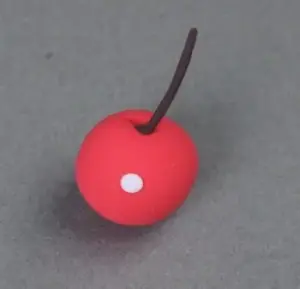
Step 7: Make a clay cherry
We first knead a small piece of red air dry clay into a ball.

Then, use a plastic knife to poke a hole in the surface of the clay ball.

Next, we take a little more brown clay and shape it into a thin strip with our fingers.

Use a plastic knife to insert the long brown strip into the small hole of the red clay ball. This way you have a finished clay cherry.

Let’s grab a little more white clay and stick it on the surface of the cherry to give it a little more shine.

Step 8: Place the clay cherries on top of the cream
Find a spot on your buttercream cake and stick the clay cherries on top.

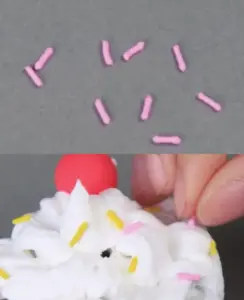
Step 9: Make clay candy bars
Now let’s make some candy bars to make the clay cake look even better! Take a little bit of yellow air dry clay and roll it into thin strips with your fingers.

Next, we use a plastic knife to cut the long strip into several uniform segments.

Stick these small yellow candy strips randomly onto the white buttercream. You just put it on gently and they stick. On the contrary, if you apply too much force, you may ruin the fluffy cream.

Repeat the above process and make some pink clay candy bars and place them on the cream as well.
At this point, our clay cake is done! How lovely it is!

Conclusion of DIY Clay Cake
Cakes made from air dry clay can be used to decorate desks, shelves or windowsills. They harden after drying, allowing you to store them for longer periods of time.
In addition, air dry clay can also be used to make ice cream, cactus or cute octopus.