

Basic Ingredients
- White Glue or Clear Glue: This is the foundation of all slime. White glue gives butter slime an opaque, soft look, while clear glue offers a translucent effect if you want brighter colors.
- Shaving Cream (Optional): For a fluffier texture, add a little shaving cream. While not essential, it can make the slime feel lighter and more fun to stretch.
- Lotion or Baby Oil: These add smoothness and help make the slime less sticky. A small amount can go a long way in improving texture.
- Model Magic Clay or Air-Dry Clay: This is the key ingredient that transforms regular slime into butter slime. It gives the slime its spreadable, buttery quality.
- Activator: To turn glue into slime, you’ll need an activator. Common options include a borax solution, baking soda mixed with contact lens solution, or liquid starch. Each works differently, so pick the one you’re most comfortable using.
- Food Coloring or Pigments: For customization, use food coloring to create vibrant shades. Pigments can also give your slime unique finishes, like a pastel or metallic effect.
Tools You’ll Need
- Mixing Bowls and Spatulas: Use a bowl to combine your ingredients and a spatula to stir without making a mess. A sturdy spatula helps when mixing thicker slime.
- Measuring Cups and Spoons: Precise measurements make all the difference in achieving the right consistency. A little too much activator or glue can completely change the slime.
- Airtight Containers: Store your butter slime in airtight containers to keep it from drying out. Butter slime lasts longer when properly sealed.
Step-by-Step Guide to Making Butter Slime
Creating butter slime is straightforward but requires some patience. Each step helps build the perfect texture and consistency.
Preparing the Base Slime
- Combine the Glue and Lotion: Start by pouring ½ cup of white or clear glue into a mixing bowl. Add a few pumps of lotion or a teaspoon of baby oil. These ingredients help soften the slime and make it less sticky.
- Optional: Add Shaving Cream: If you prefer a fluffier texture, mix in a small dollop of shaving cream. Stir thoroughly to ensure it blends evenly.
- Add the Activator Slowly: Choose your activator (e.g., borax solution or baking soda with contact lens solution) and add it one teaspoon at a time. Stir after each addition until the slime begins to pull away from the bowl. Be careful not to add too much, as this can make the slime stiff.
- Knead the Base: Once the mixture comes together, use your hands to knead it. This helps achieve a smooth and stretchy consistency. If it’s too sticky, add a little more activator.
Incorporating the Clay
- Add the Model Magic or Air-Dry Clay: Take a small chunk of clay and press it into the slime. Begin kneading it in with your hands.
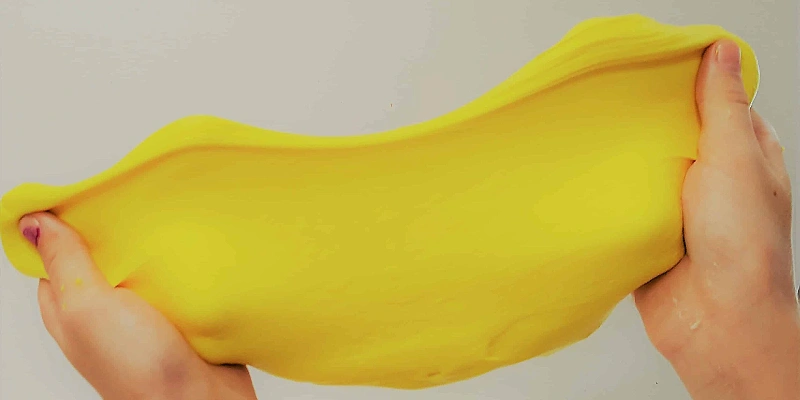
- Blend Thoroughly: Work the clay into the base slime until the texture is even. This step is crucial for achieving the signature buttery feel. If the slime feels too stiff, add a few drops of lotion to soften it.
- Check for Consistency: The slime should now stretch easily and have a soft, velvety texture. If it doesn’t feel right, adjust by adding a little more clay or base slime as needed.
Customizing Your Butter Slime
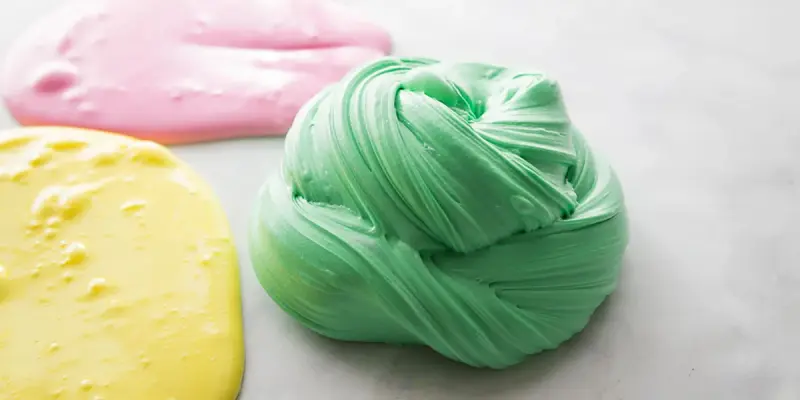
- Add Colors: Choose food coloring or pigments to give your butter slime a fun look. Add a few drops and knead it in until the color is uniform. Pastel shades often work best for butter slime.
- Incorporate Scents: For a sensory upgrade, add a drop or two of essential oil or a safe fragrance. Vanilla or lemon are popular choices.
- Create Variations: Experiment with swirl or marble effects by mixing two different colors lightly. You can also sprinkle in glitter for an extra sparkle.
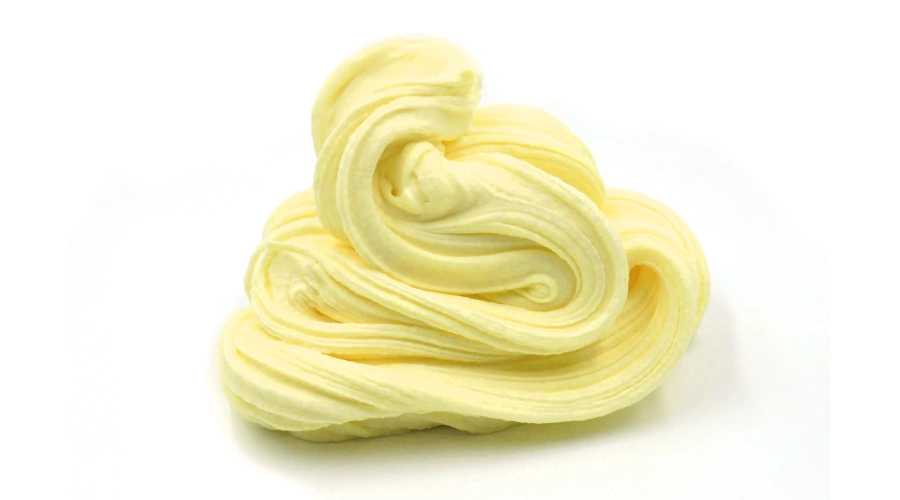
Butter slime is endlessly customizable. Whether you’re making a bright yellow batch to resemble butter or a soothing lavender shade, the process is as fun as the final product. Once you’ve mastered the basics, the creative possibilities are limitless!
Common Issues and How to Fix Them
Even when you follow the steps carefully, you might run into some common issues while making butter slime. Don’t worry—each problem has a simple solution.
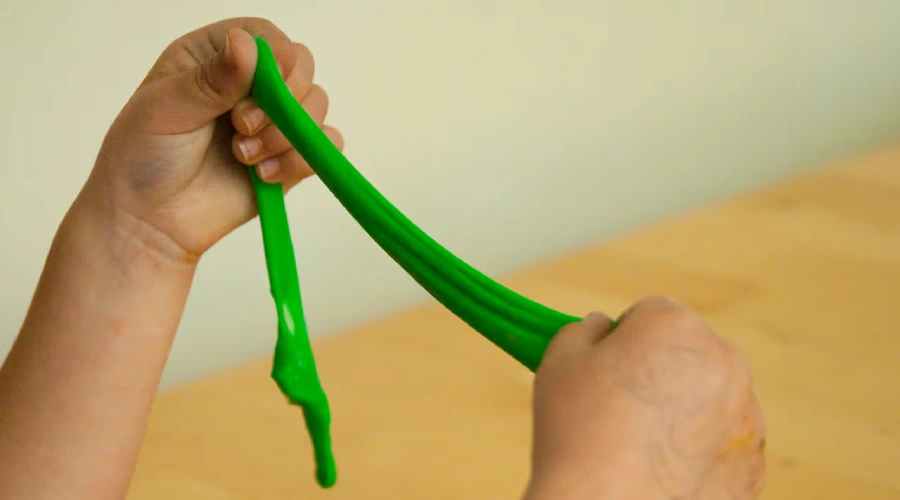
Why is My Butter Slime Sticky?
If your butter slime is too sticky, it’s often because there isn’t enough activator mixed in.
Adjusting the Activator Ratio: To fix this, add a small amount of your activator—borax solution, baking soda with contact lens solution, or liquid starch. Stir it in slowly, bit by bit, until the slime begins to pull away from the sides of the bowl. Be cautious not to add too much at once, as over-activating can make the slime too firm.
If it’s still sticky after a few adjustments, knead it with your hands. The warmth from your hands can help it set.
What If My Butter Slime is Too Hard?
Sometimes, butter slime can become too firm, losing its smooth, soft texture. This usually happens when too much activator has been added.
- Adding Lotion or Water
If your slime feels too stiff, you can add a few drops of water or lotion to soften it. Knead it well until it reaches the desired smoothness. Adding lotion will help retain the “buttery” texture.
- Rebalancing the Consistency
If the slime is still too hard after adding lotion or water, mix in a small piece of model magic or air-dry clay. The clay will help bring the slime back to its signature texture.
Maintaining the Perfect Consistency
Once you’ve perfected your butter slime, you’ll want to keep it in good condition. Here are some tips to maintain its texture:
- Prevent Over-Activation
Be cautious when adding activators. Always start with a small amount and gradually add more if needed. Over-activating can result in a rubbery or hard slime that loses its soft, buttery feel.
Storage Matters
After playing, store your butter slime in an airtight container. This will keep it from drying out and maintain the right consistency for longer.
Safety Tips for Making Butter Slime
Making butter slime can be a fun and creative activity, but it’s important to follow some safety tips to ensure the process is both enjoyable and safe for everyone involved.
Using Safe Ingredients
When making butter slime, the first step is to choose safe, non-toxic materials. This is especially important if children are involved.
- Ensuring Child-Friendly Materials
Always use white glue or clear glue labeled as non-toxic. Many craft stores sell slime kits with pre-measured ingredients that ensure safety for kids. It’s also crucial to choose lotions and baby oils that are gentle on skin and free of harsh chemicals.
- Avoiding Toxic Chemicals in Activators
Some slime activators, like borax, can be toxic if not handled properly. If using borax, always dilute it according to the instructions and keep it out of reach of young children.
Alternative activators, such as baking soda with contact lens solution or liquid starch, can be safer options and are just as effective.
Supervision and Storage
Even though butter slime is relatively safe to make, adult supervision is recommended to ensure that everything goes smoothly.
- Importance of Adult Supervision During Crafting
When making butter slime with children, always supervise the process. This includes monitoring how they handle ingredients and making sure they don’t ingest any of the materials.
Keeping an eye on younger children helps avoid any accidental spills or messes that could lead to choking hazards.
- Proper Storage to Prevent Drying Out or Contamination
Once your butter slime is ready, it’s important to store it correctly.
Keep it in an airtight container to prevent it from drying out. This will also keep it free from dirt or bacteria, especially if it’s been sitting out for a while. If you notice any changes in texture or color, it’s a good idea to discard it and make a fresh batch.
How to Make Butter Slime Without Clay
Butter slime is loved for its smooth, spreadable texture. While clay is a common ingredient, it’s possible to make butter slime without it. By substituting clay with other materials, you can still achieve a soft, buttery consistency.
Step 1: Gather Your Ingredients
For this version, you’ll need:
- White school glue (about 4 oz.)
- Shaving cream (optional, for a fluffier texture)
- Cornstarch (to replace clay and add the smooth finish)
- Lotion (to enhance softness)
- Slime activator (borax solution, saline solution, or liquid starch)
- Food coloring (for customization)
Cornstarch acts as the alternative to clay, giving the slime its signature buttery feel.
Step 2: Create the Base Slime
- Mix the glue and shaving cream (if used) in a bowl. Combine thoroughly for a creamy texture.
- Add a few pumps of lotion to keep the slime soft and pliable.
- Slowly add the slime activator, stirring constantly until the mixture begins to pull away from the bowl.
Once it starts to form, knead the slime with your hands until it’s smooth. Be patient—this step ensures the right consistency.
Step 3: Add Cornstarch
Sprinkle a small amount of cornstarch onto the slime and knead it in. Gradually add more until the slime feels soft and spreadable. Cornstarch mimics the role of clay, helping achieve a smooth texture without making the slime sticky.
If the slime becomes too stiff, add a little lotion or warm water to restore elasticity.
Step 4: Customize Your Butter Slime
Mix in your favorite food coloring to brighten the slime. You can also add scents, like vanilla or lavender, for a sensory twist. For a fun variation, try layering different colors to create a rainbow butter slime effect.
Making butter slime without clay proves you don’t need fancy ingredients to enjoy crafting. With cornstarch and a bit of creativity, this DIY project becomes both simple and enjoyable.
Comparing Butter Slime with Other Types of Slime
Butter slime stands out for its soft, smooth texture, but there are many other types of slime that offer different experiences.
Fluffy Slime vs. Butter Slime
Both fluffy slime and butter slime are soft, but their textures and the way they are made differ. Fluffy slime has a lighter, airier feel, while butter slime is much denser and creamier.

How Many Types of Slime Are There? Explore Squishy Science
Explore the surprising world of slime varieties, their textures, and the science behind them in this kid-friendly educational breakdown.