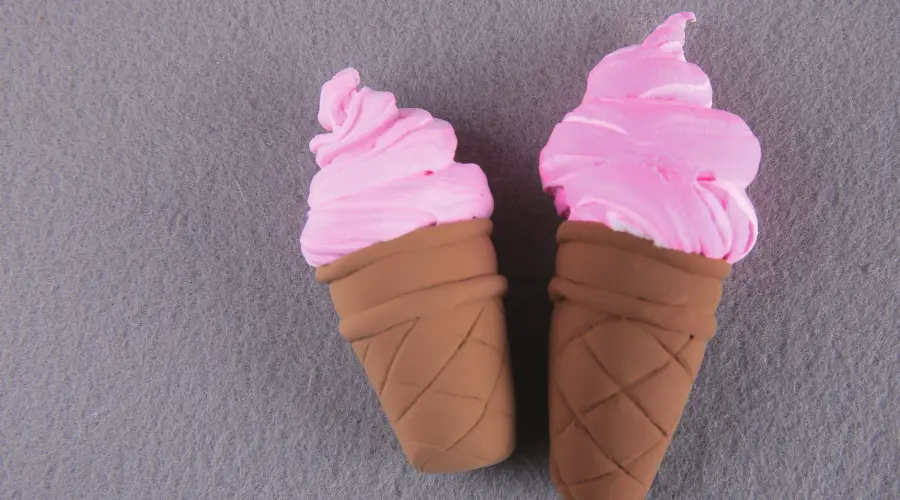
On a hot summer day, having an ice cream is such a pleasant thing. Ice cream is not only delicious, but also beautiful, and many people like to make them into decorations. DIY clay ice cream is a great idea and can develop children’s imagination and creativity.
We usually use air dry clay to make DIY crafts. The following is a tutorial about clay ice cream. We will help you make beautiful and delicious clay ice cream step by step!
Material preparation
We need to prepare 5 basic colors of air dry clay: white, brown, yellow, pink and orange. This is a super light clay that dries at room temperature and is suitable for kids to make DIY crafts.

Additionally, you will need a small plastic knife. We will use it later to sculpt the surface of the clay ice cream cone.
Clay Ice Cream DIY STEPS Tutorial
We will make clay ice cream in two parts, the cone and the cream. In this tutorial, we’ll learn how to mix clay to get new colors. Get started now!
Step 1: Make a coffee-colored clay ice cream cone
If you have air dry clay in this color, you can skip this step.
We will use yellow, brown and orange clay to create the coffee color. The three colors of clay should be about the same size.

Mix the three colors of clay by stretching and kneading them, and they will eventually turn into a uniform coffee color. If you feel the color is not right, you can continue to add yellow or orange or brown clay to adjust.
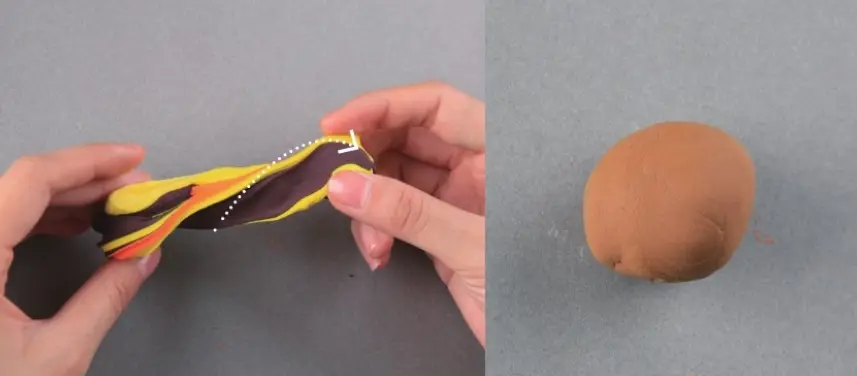
This step helps children understand colors. In the process of playing, children’s artistic talents and potential will be activated.
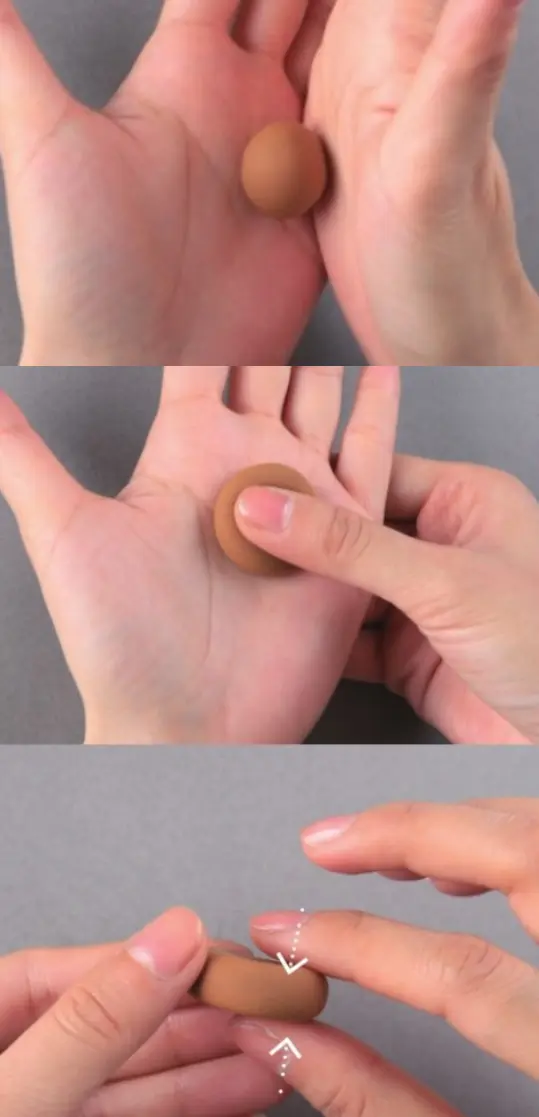
Step 2: Divide the coffee color clay into two parts
In the first step we get a piece of coffee colored clay. Now we divide it into two parts, one large and one small. Knead the large portion into a cone shape.
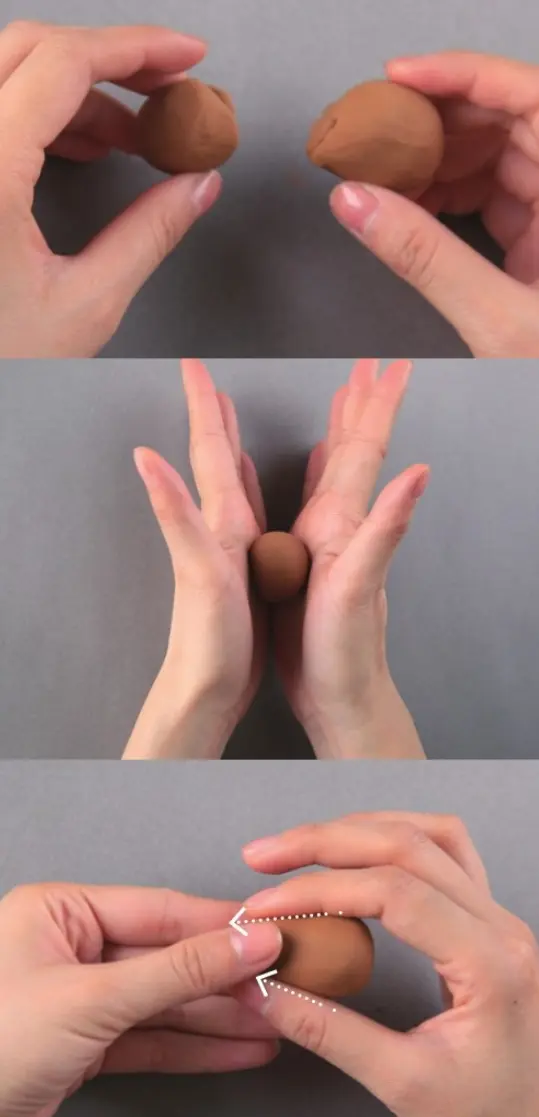
Pay attention to controlling the strength of your palms when kneading. We can use our fingers to adjust the edges of the clay to make it smooth.
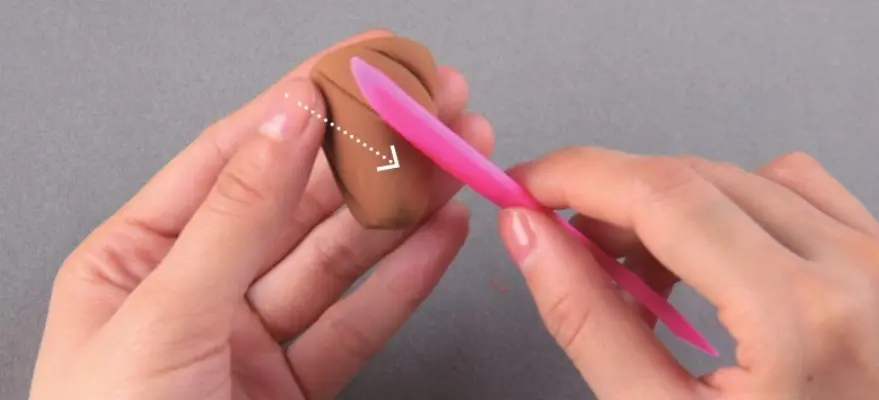
Step 3: Carve the pattern on the clay cone
We will use a tool for this step – a plastic knife. Of course, you can also use other tools instead, such as a ruler. Please be careful not to use a kitchen knife as it may injure you.
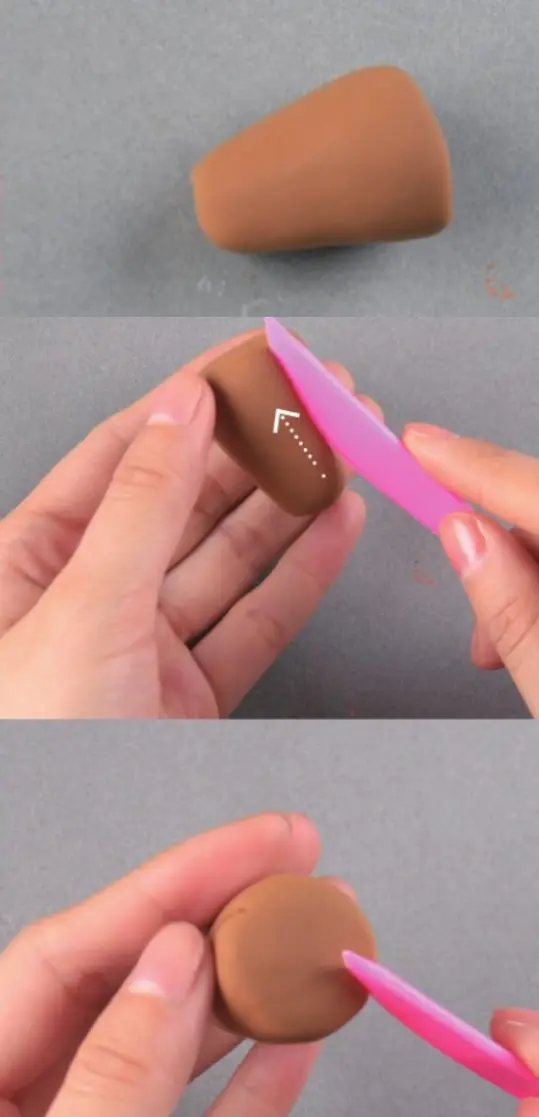
You’ll need to hold the clay cone in one hand and the knife in the other. Then carve two straight lines from top to bottom along the surface of the cone.
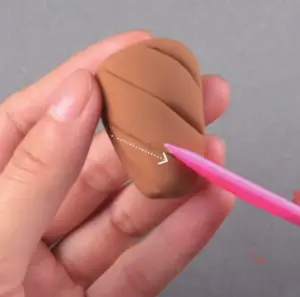
Next, we are going to carve a criss-cross pattern on the cone. This time, we start by carving the lines diagonally from the upper left to the lower right.
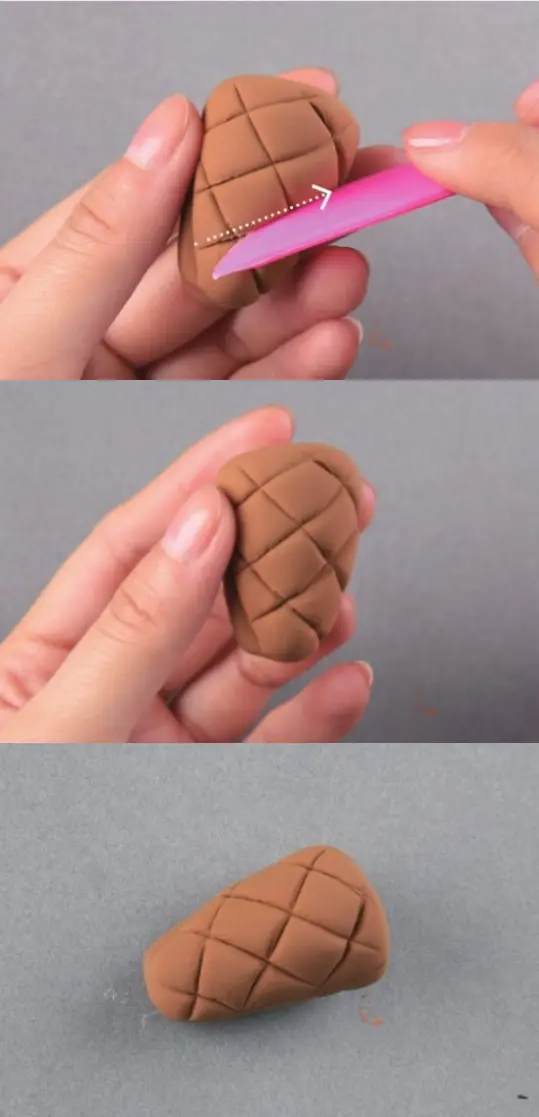
Then carve the same number of lines from the bottom left to the top right. In this way, we will carve a cross-lattice pattern on the surface of the clay cone. Doesn’t it look like an ice cream cone?
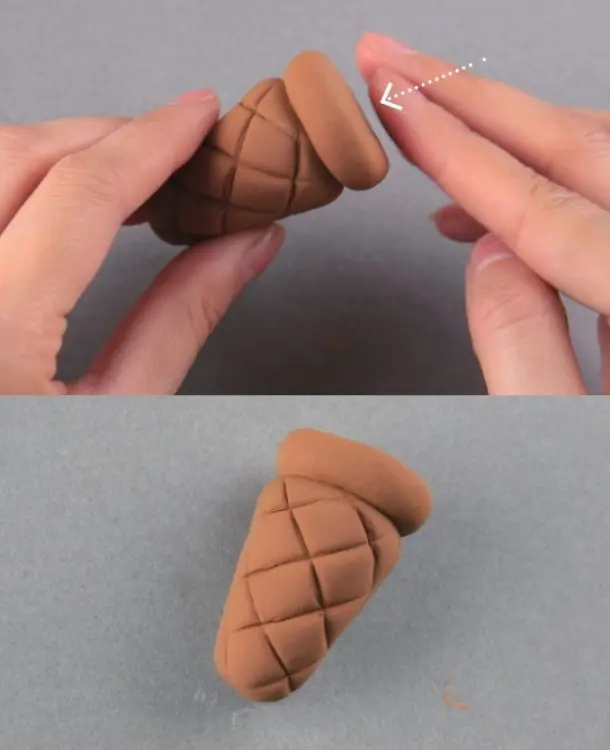
Step 4: Decorate the top of the clay cone
We take the small portion of coffee-colored clay and continue dividing it into two parts, one large and one small. For the larger part, we round it first and then press it into a thicker cake shape.
Attach this round cake to the top of the cone made in step 3. We can press them firmly with our fingers.
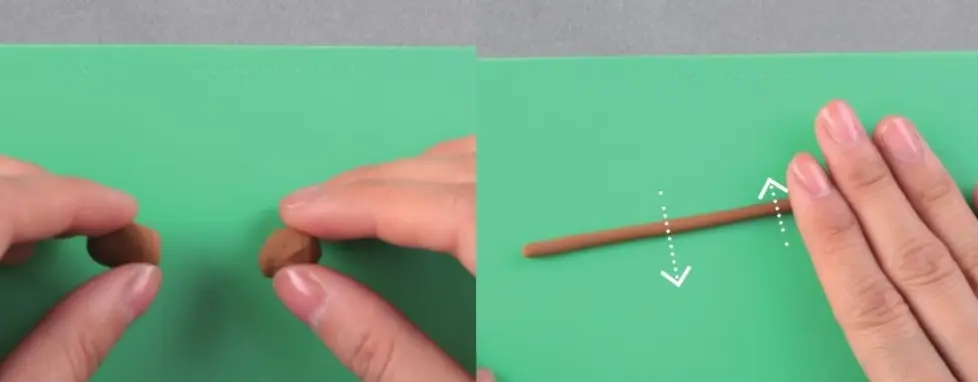
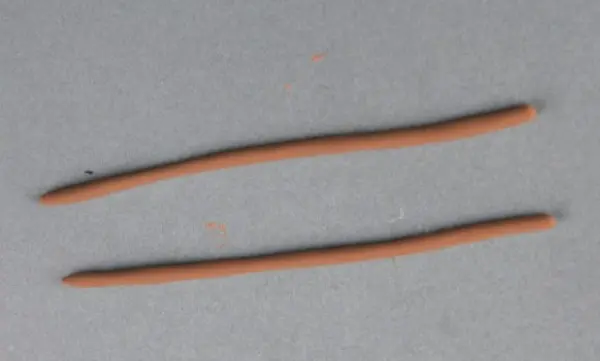
Next, we divide the remaining coffee-colored clay into two small balls. Use your palms to roll them into long, thin strips.
Wrap the strip around the top of the cone as shown. You can use small scissors to cut off the excess, or you can just pinch it off with your fingernails.
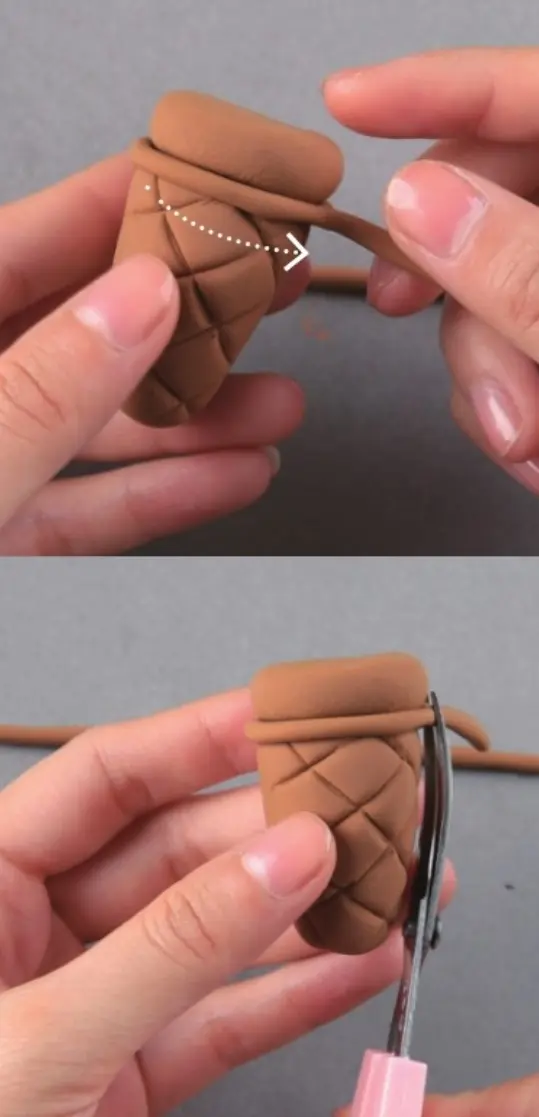
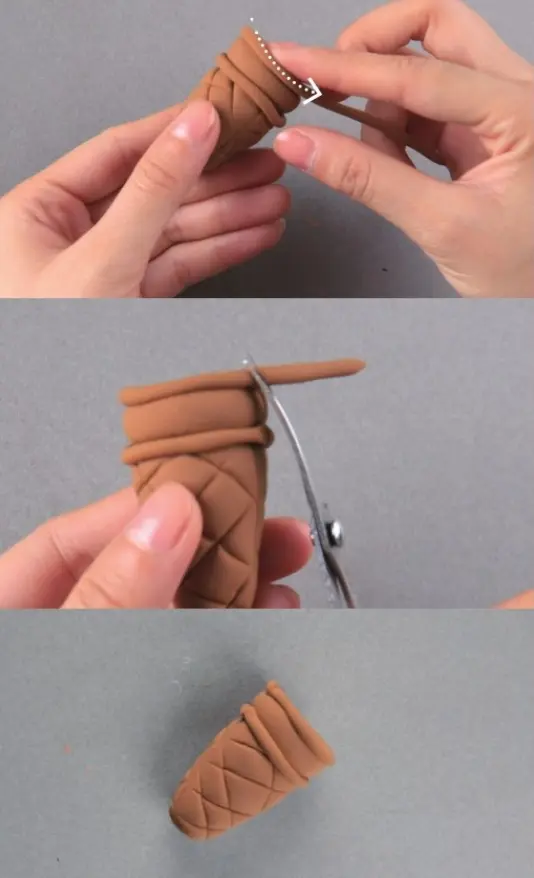
Note that where the two ends of the clay strip are connected, pinch them together with your fingers.
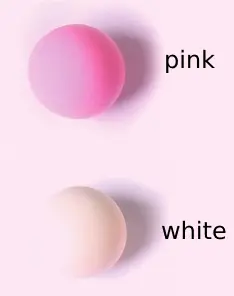
Step 5: Make pink and white clay cream
We need to use pink and white air dry clay. In this step, we also need to mix the two colors of clay, but not completely.
During the stretching and kneading process, stop when the pink and white colors cross. This way the distinction between the two colors is still clear. We don’t need them mixed into a new color.
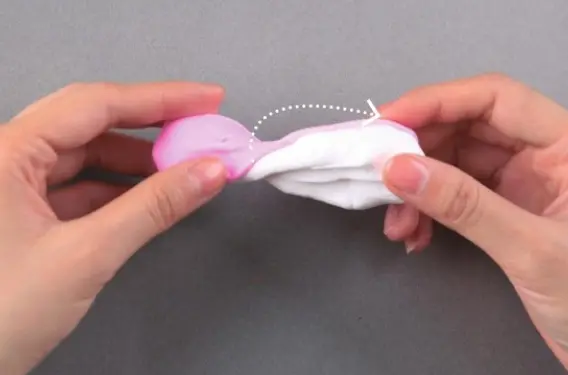
If you accidentally mix them completely into a new color, you’ll just have to do it all over again. Air dry clay that has turned into another color cannot be restored to two colors.
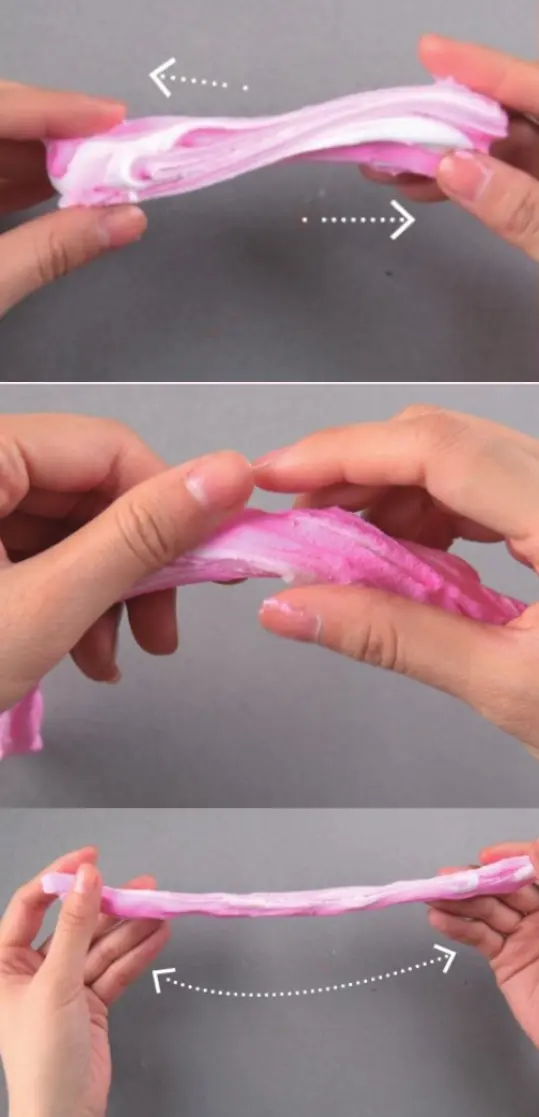
Step 6: Make the cream shape
Honestly, this is the hardest step. First, we need to stretch and lightly knead the mixed clay so that it looks creamy and bubbly.
Next, we glue the long strips of clay cream onto the cone in circles. When it is sticky, our fingers need to control the clay and rotate it gently. This will make the color of the clay look better.
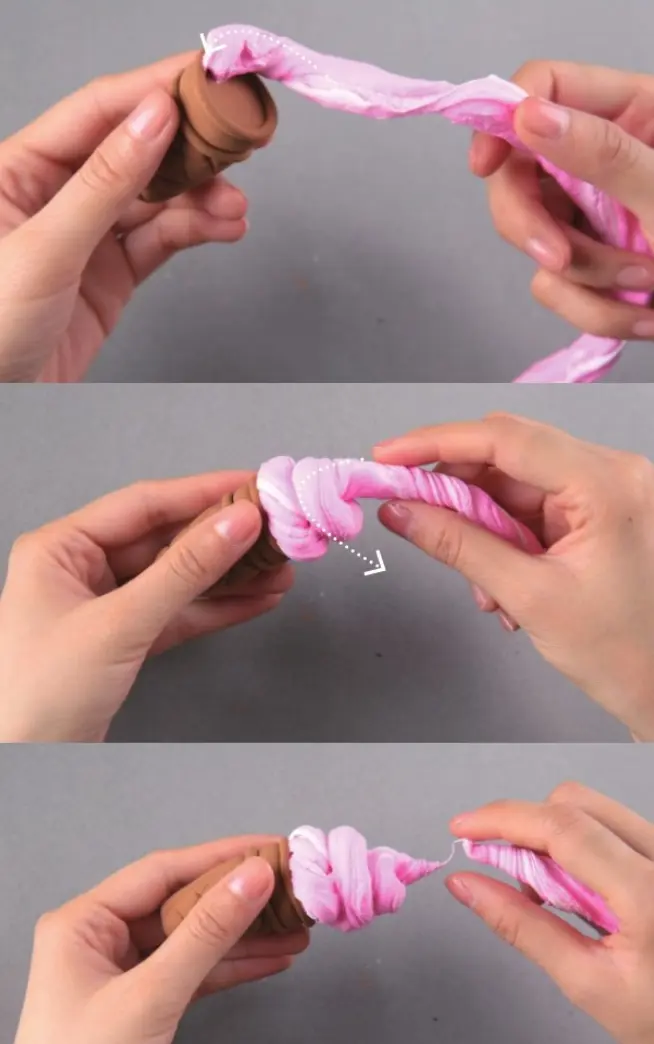
Finally, twist off the excess clay. Be careful not to use scissors or other tools as they will ruin the visual effect of the clay butter tip.
Conclusion of Clay Ice Cream
Making ice cream with air dry clay is a fun game. At the same time, it also has teaching significance and is helpful for children’s growth.
When making clay ice cream, some steps are difficult and require children to have excellent hands-on skills. We recommend parents purchase an ice cream maker toy set for younger kids.
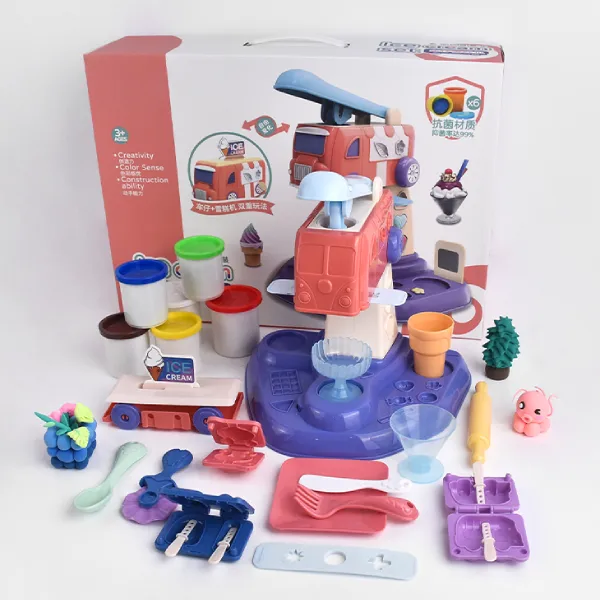
These sets make it easier for kids to create great-looking clay ice cream.
If you have older children, you can challenge them to make clay ice cream in this issue through communication and teamwork.