
How OEM Toy Manufacturing Works: From Idea to Product
Understand how toy ideas become finished products through OEM manufacturing, with key steps, decision points, and compliance requirements.
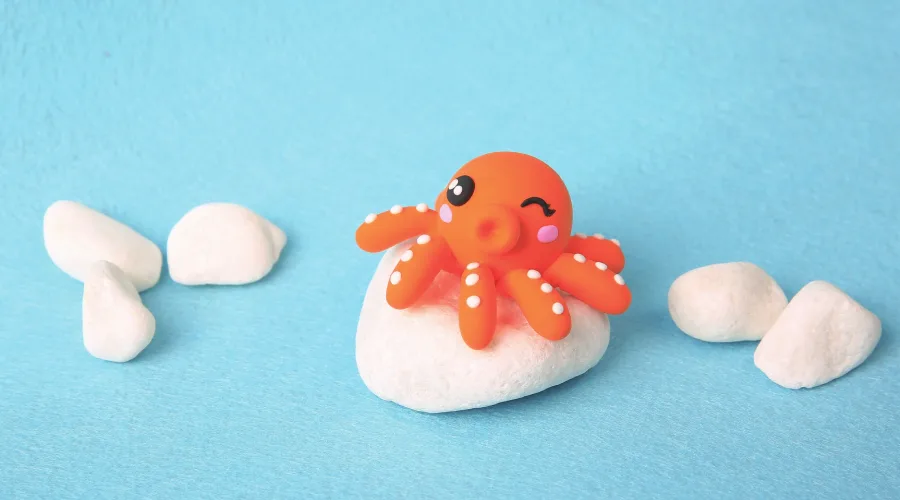
Air dry clay is a water-based modeling material that hardens when exposed to air. Because it does not need heat to cure, it is easier for young makers and hobbyists to use. In miniature crafting, scale matters.
Tiny pieces highlight details, surface texture, and drying behavior in ways that larger sculptures do not. So learning how the material behaves makes work smoother and less frustrating.
Many air dry clays remain soft and workable for a reasonable time after opening. This gives beginners space to refine shapes, smooth seams, and add tiny features without rushing. When left uncovered, water slowly evaporates from the clay matrix until it hardens.
For miniature food, furniture, or figurines, this slow and steady curing allows more control. A student once sculpted a set of tiny “dumplings” for a dollhouse banquet. The extra minutes of open work time let her pinch folds into each dumpling without tearing the surface. She joked that the “chef” needed no oven.
After drying, the clay is lightweight. This helps when pieces must stand on thin legs or attach to fragile scenes. Heavy materials sometimes topple or sag at scale, but air dry clay avoids much of that due to its lower density.

Oven-bake polymer clays cure through a plasticizing process when heated. Air dry clays harden through water loss and binder setting. Because the mechanisms differ, the final texture differs too. Air dry clay often feels more porous, while polymer clay cures denser and stronger.
For miniature work, these traits change design choices. Oven-bake clays may hold sharper edges without sanding. However, they require heat appliances and thicker pieces to avoid burning or discoloration. Air dry clay avoids temperature concerns but may need light sanding after curing.
At small scale, ease of correction matters. Polymer clay stays workable until baking, which is helpful for complex parts. Air dry clay, once dried, cannot return to softness. So some artists build pieces in stages, letting each part dry before adding the next. This also reduces warping and collapse.
When sculpting very small pieces, surface area becomes important. Thin parts dry faster because more moisture escapes per unit volume. A clay leaf the size of a fingernail may harden in hours, while a thick apple-sized piece may need days. This is basic diffusion at work and can be measured in controlled studies of drying ceramics.
Small pieces also reveal cracking behavior more easily. As clay shrinks, internal stress forms. On a large sculpture the cracks may blend in. On a 1:12 scale miniature table, even a hairline crack can look like a canyon. Makers often adjust thickness or add filler to reduce shrinkage stress.
Additionally, fine textures such as wood grain, woven fabric, or pastry folds rely on the clay’s ability to hold micro-lines. Some air dry clays support this well; others become mushy at too much detail. Testing small samples before starting a full project saves time and disappointment.
Miniature work depends on accuracy. Because tiny shapes exaggerate even the smallest errors, tools that give control matter more than force. Many artists start with only a few hand tools, yet the improvement in texture, angles, and seams is noticeable.
Tools also help children work safely by reducing the need to press or pull too hard on the clay. Good storage habits keep tools clean, sharp edges protected, and craft spaces pleasant instead of chaotic.
Small metal or plastic sculpting tools help create curves, folds, and surface marks. A simple rounded stylus can form smooth bowls or indentations, while a pointed tool can bring out hair strands or plant veins. Meanwhile, silicone-tipped shapers are useful for blending seams without leaving fingerprints, which often look huge at miniature scale.
Many hobbyists also borrow tools from other fields. A soft toothbrush can make subtle crumbs for miniature bread, and a sewing needle can score fine lines for wicker or wood. In one club workshop, a kid used the back of a mechanical pencil to stamp tiny bottle caps. The room laughed, but the results were spot-on.
For sanding and refining dried clay, thin nail files or ultra-fine sandpaper help smooth rough edges. Sanding should be slow and supported from behind so delicate parts do not snap. Wet sanding sometimes works better on porous clays because it traps dust and reduces scratching.

While most miniature sculpting tools are mild, some have points or thin edges. Kids tend to grip tools tightly and sometimes push them toward their other hand. Small safety tweaks—such as keeping hands behind the working edge and using rubber grips—lower the risk of pokes.
Instructors often remind beginners not to put tools in their mouths. It sounds obvious, but young makers lost in concentration sometimes park a stylus between their lips like a pen. For clays that create dust during sanding, a simple dust mask or wet technique reduces airborne particles.
Because air dry clay crafting has no heating stage, it avoids oven burns entirely. Still, clean-up prevents slipping hazards. Dried crumbs on the floor act like tiny ball bearings under socks—amusing until someone slides across the room like a cartoon.
Small sculpting tools vanish easily under paper, fabric, or clay scraps. A shallow tray or magnetic strip keeps the lineup visible during work. After sessions, tools should be wiped to remove clay film, which can stiffen joints or corrode metal over time.
Kids also benefit from labeled containers and simple storage rules. Instead of complex organization systems, instructors often use color-coded cups: red for sharp points, blue for blunt shapes, and green for brushes. The system is memorable and reduces the “Where did that go?” panic during group activities.
At home, storing tools away from moisture prevents rust, especially on fine needles or small blades. Drying time before storage matters, too. Wet brushes smashed into jars grow mildew and stiffen bristles, making them unusable for soft surface effects later.
When clay is not conditioned, it can tear, crumble, or trap tiny air bubbles that later expand as the clay dries. Kids often skip this step because it feels slow, but once they try making miniature food or furniture, the value becomes obvious. Good preparation reduces waste, improves detail, and prevents cracks that would otherwise appear after drying.
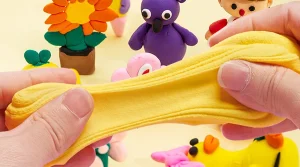
Before sculpting, most artists soften the clay by pressing it between the fingers or rolling it into short logs. Kneading blends moisture and fillers inside the clay, and this makes it behave more evenly. For miniatures, the kneading motion should be light and repetitive so the clay does not become too warm or floppy.
Air pockets are small bubbles trapped inside the clay. They may not matter for full-size shapes, but at miniature scale they can burst during drying and leave craters. Rolling the clay into thin sheets and folding it helps push air toward the edge. Some hobbyists also pinch and twist small pieces to release hidden bubbles, much like squeezing air out of bread dough.
Temperature changes how soft the clay becomes. Warm rooms make air dry clay feel stickier and more elastic, which is fine for spreading textures but difficult for sharp corners. In cooler rooms, the same clay stiffens and may need more kneading to reach a workable state.
Humidity also plays a role. High humidity slows evaporation, so the clay stays workable longer. In dry climates, the surface can form a thin crust within minutes. Teachers in desert regions often place damp cloths over unused clay or store small lumps in sealed cups between steps.
Miniature artists sometimes use their own body heat to adjust workability—pressing the clay in the palm briefly warms it, while resting it on a cool tile firms it up. These small temperature tricks can make sculpting tiny fruits, pastries, or dollhouse plants feel much smoother and less frustrating.
Cracks in air dry clay often form because the surface dries faster than the inside. To prevent this, conditioning must distribute moisture evenly. If the clay feels dusty or chalky, adding a small amount of water on the fingertips can restore pliability. Too much water, however, weakens the structure and makes fine details collapse.
Cracks also appear when different parts of the model dry at different speeds. When building miniatures with multiple layers—like a tiny mug with a handle—allowing the base layer to firm up slightly before adding details can keep stress lines from forming later.
When kids work, they often press hard and scrape the surface, creating stress points that eventually split. Encouraging gentle shaping instead of force helps avoid this. It also allows the clay to settle into its final position with fewer internal tensions, which is especially helpful for thin stems, rods, and handles.

Miniature sculpting rewards patience and accuracy more than strength. Instead of forcing shapes into place, artists use small motions, gentle pressure, and gradual build-up.
Layering means adding clay in small increments instead of sculpting everything at once. The base form carries the structure, while additional pieces provide shape, edges, and decorative details. For example, a tiny teapot begins as a simple round body. Once that firms up, the spout, lid, and handle are added piece by piece.
Additive methods also reduce handling stress. Pressing and pulling a single lump often distorts earlier work, but attaching fresh material keeps the original form intact. Kids sometimes compare it to building with toy bricks: first the body, then the features, and finally the flourishes.
When using air dry clay, timing matters. Semi-dry surfaces allow details to grip without mushing into the base. Artists often wait a few minutes between layers to let moisture evaporate, especially when working at miniature scale.
Subtractive sculpting involves removing material to create texture or depth. With air dry clay, this is done while the clay is still soft, since fully cured clay can be brittle and harder to carve. Using needles, fine loops, or toothpicks, artists scrape or cut away thin lines to mimic natural grain or fabric folds.
Small, repeated marks can imitate rough surfaces like bread crust, bricks, or tree bark. Meanwhile, long shallow strokes create wood planks or folded drapery. Subtractive methods also prevent excessive bulk. For miniature objects, too much thickness looks unrealistic, even if the sculpt is accurate up close.
Many instructors teach kids to “test at arm’s length.” A texture that seems dramatic on the table often becomes faint when viewed from farther away, which is the actual viewing distance for most miniature displays.
Scale controls how large objects appear relative to each other. For dollhouses, a common scale is 1:12, meaning one inch equals one foot in real life. Without scale, a tiny cup may look oversized next to a table, and the illusion breaks.
Proportion describes the size relationships within a single object. Even if a miniature chair is the right height, it will look odd if the legs are too thick. Children often learn this by trial and error; in one workshop, a student made a tiny piano whose keys were so large it resembled a sci-fi control panel.
Visual readability is the idea that details must make sense from a normal viewing distance. Overly tiny marks vanish, while oversized details look cartoonish. Air dry clay’s slight shrinkage during curing also affects readability, so sculptors sometimes exaggerate certain features by a few percent to compensate.
Drying is not just waiting for the clock. For miniatures, the pace of drying changes how the shapes hold up.
Natural drying allows moisture to leave the clay at its own pace. This gives better shape retention and often reduces cracks. Placing pieces on a breathable surface, such as a paper sheet or unglazed tile, helps moisture escape evenly. Turning the object every few hours keeps one side from flattening, especially for rounded or doughy shapes.
Assisted drying uses airflow or heat to accelerate curing. Small fans on low speed can dry thin miniatures faster without introducing heat gradients. Gentle airflow works better than high heat, which may form a dry outer shell while the interior remains wet. That shell can later collapse.
Some hobbyists warm clay indirectly by placing it near—not on—a warm appliance. The goal is mild energy transfer rather than cooking. Kids often get excited about “speed runs,” but instructors remind them that rushing usually leads to leaning furniture or droopy figurine arms.

Warping happens when one part loses moisture faster than another. For example, a miniature pizza crust may curl upward while drying because the exposed top shrinks more than the underside. Flipping or lightly weighting thin pieces keeps them flat. For very flat miniatures, pressing between parchment sheets works well until the initial moisture stage passes.
Structural collapse appears in objects with tall or narrow sections, like chair legs or plant stems. Artists sometimes let partial builds firm up before adding additional height. This staggered schedule reduces the load on soft clay and keeps balance intact.
Moisture control also prevents collapse. If a child adds water to “fix” crumbly clay and creates a puddle, the object feels workable but later slumps as the excess evaporates. Controlled hydration—just a dab, never a splash—maintains shape.
Small clay pieces dry faster, but “dry” does not always mean “cured.” Early in drying, the surface feels matte and firm, but the interior may still be flexible. Pressing hard can buckle the part or leave dents. Full curing happens when the interior moisture reaches equilibrium with the environment. At this stage, pieces sound slightly sharper when tapped together, similar to chalk or dry plaster.
Color change can also signal curing. Many air dry clays lighten as they dry because water scatters light differently than solid clay. Kids often treat this like a disappearing magic trick, but it is actually a useful visual indicator.
Before sanding or assembling, makers check structural cues. If a thin handle bends instead of resists pressure, it needs more time. Rushing the final assembly stage often introduces stress that later cracks as the clay continues shrinking.
Finishing also improves how tiny objects read at a distance. For kids, this stage teaches patience and problem-solving. For adults, it provides a level of precision that makes miniature food, furniture, and figures look intentional instead of accidental.
Dry sanding removes raised bumps and sharp edges. Thin nail files, micro-abrasives, and ultra-fine sandpaper help control how much material is removed. Because miniatures are delicate, sanding is done with light strokes rather than pressure. Wet sanding is useful for porous clays because it reduces dust and keeps edges from crumbling.
Filing comes in when shapes need more defined geometry. Needle files can square corners on tiny furniture or refine small cylinders like cups or vases. Filing should be done slowly, since aggressive cuts may chip the clay. Kids often start sanding too early and end up smearing the surface; waiting until the clay is fully cured avoids that issue.
To finish, many makers buff the surface with a soft cloth. This does not polish like metal, but it removes powder and helps reveal where more work might be needed. At miniature scale, even subtle refinement changes how light interacts with the surface.

Textures do not always have to be added before drying. Dry clay accepts scratches and impressions with different characteristics than wet clay. For example, scoring dry lines into miniature bread crust makes the cuts look sharper and more crumbly, while wet scoring looks too smooth.
Artists also drill tiny holes for hardware or decorations, such as drawer knobs in miniature furniture. Using pin vises or fine awls allows more control than cutting with blades. Kids like this stage because it feels like engineering—“installing” handles and beams even at tiny scale.
For layered models, dry texturing prevents the newly added relief from blending into the base. This approach is used on figurines when defining wrinkles in clothing or folds in cloaks. Too many marks can clutter the surface, so readability remains an important guide.
Sealing makes dried clay less prone to chipping, humidity changes, or smudges from handling. Clear coatings create a barrier that helps stabilize porous materials. Some sealers add gloss, while others remain matte. The choice is aesthetic, but matte finishes often read better on miniature furniture, while slight gloss works for realistic foods or ceramics.
Kids tend to handle miniatures a lot, so sealing protects corners from wearing down. However, sealing must wait until the clay is fully dry. If sealed too early, moisture can get trapped inside and cause swelling or hairline cracks.
Sealers do not make miniatures indestructible. Thin stems, handles, and limbs still require careful handling. Teaching storage habits—keeping delicate pieces in small trays or tiny cases—extends their lifespan. In schools and clubs, finished pieces are often placed in labeled drawers instead of bags, where pressure could crush them.
Color transforms small forms into believable objects. Because miniatures rely on visual cues more than scale, subtle shifts in tone and finish can make clay read as wood, metal, bread crust, or skin.
Painting can happen either before sealing or after, depending on the look desired. Painting before sealing lets pigments soak into the clay’s surface. This works well for organic items like bread, fruit, and stones because the color embeds into the texture rather than floating on top. It also helps avoid flaking if the miniature will be handled often.
Painting after sealing keeps colors brighter and more even. Sealers act like primers, preventing paint from being absorbed and allowing smoother gradients. This is common for figurines or furniture where crisp, solid hues are needed. However, painting after sealing may reduce the visible surface texture, so artists sometimes selectively seal only parts of a piece.
When teaching kids or beginners, post-seal painting is easier to control and more forgiving. Advanced makers may combine both: a base stain before sealing for natural depth, then detail painting afterward for precision.
Miniature painting leans heavily on layered color instead of single flat coats. Thin washes flow into recesses and create natural shadows. Dry brushing catches raised edges and creates highlights. Together, these mimic wear patterns found on life-sized objects.
Pigment powders can be rubbed directly into porous clay for soft gradients that air dry clay absorbs well. This works for blush on tiny characters, aging on old wood, or the browned edge of miniature pastries. Unlike wet paint, pigments are easy for kids to experiment with—mistakes can be brushed off before sealing.
Layering also addresses readability. At miniature scale, objects need extra contrast to look “correct.” A wooden crate with only brown paint reads flat, but adding darker washes in seams and lighter strokes on planks makes it pop from a distance. In clubs and classroom settings, this is often where students feel their piece suddenly becomes “real.”

Realism at tiny scale challenges perception. Materials that seem simple at full size—glass, metal, bread, soil—each break down into cues of color, gloss, and texture.
Because viewers are so close to miniatures, the effects should be slightly exaggerated. A 5 mm wooden drawer may need more contrast than a life-sized one to read as wood. Kids often discover this by accident, while adult modelers learn to do it intentionally.
Sealing locks in these finishes and protects pigments from rubbing off. High-gloss sealers are popular for ceramics, while matte keeps most everyday items believable. Choosing the right sheen is often the final realism check.
Miniatures are rarely single pieces. Tiny bowls sit on tiny tables, and tiny figures lean on tiny railings. Because the scale is so small, every joint and seam matters. Makers must think about strength and balance without adding weight or thickness.
The simplest joins use pressure and tacky bonding. For air dry clay, lightly damp surfaces fuse more cleanly and avoid thick seams. Too much water makes slurry and weakens the joint. Small tools, like toothpicks or metal needles, help press pieces together while keeping the edges crisp.
When attaching items like fruit on plates or books on shelves, adhesive is sometimes used after drying. Thin craft glues spread in small dots to avoid blobs that ruin scale. A class of 10-year-olds once glued miniature apples to a tray, only to see excess glue spill over and look like melted plastic. They learned fast: “less is more” in small worlds.
For moveable or toy-like builds, extra bulk is avoided by nesting joints. For example, a leg can be inserted into a shallow socket rather than simply glued to a flat surface. This adds strength without changing shape or proportion.
Armatures act like skeletons inside tiny sculptures. Thin wire, pins, or even fibers provide stiffness during shaping and drying. Air dry clay shrinks slightly as it loses water, which can stress unsupported parts. Armatures reduce bending and sagging, especially for long shapes like arms, branches, or chair legs.
Frames also guide form. Makers sometimes use cardstock or balsa wood under clay for flat structures such as floors or tabletops. This keeps pieces from warping while also saving clay. In small dioramas, cardboard bulkheads create walls that stay square while the clay adds surface detail.
Reinforcement methods depend on how the miniature will be used. Display pieces can rely on delicate supports, while play pieces need tougher cores. Model train hobbyists often build trees with wire limbs and only a thin layer of clay, keeping them both light and flexible.
Stability becomes a key engineering problem once scenes get crowded. A tiny plate is fine alone, but in a café scene it may sit near a tilted cup, a stool, and a potted plant. Makers often use bases or platforms to give each scene a “ground” so pieces do not topple from small vibrations.
Balance also changes with interactions. Tabletop gamers expect miniatures to survive bumps and hand movement. To improve center of gravity, artists may add heavier material below the clay, such as a metal washer under a figure’s feet. This trick reduces tipping without changing design.

Creating miniature masterpieces with air dry clay combines patience, precision, and creativity. With careful drying, finishing, coloring, and structural support, both kids and adults can craft durable, realistic miniatures. Practice and observation make every small piece a success.
Understand how toy ideas become finished products through OEM manufacturing, with key steps, decision points, and compliance requirements.
Want better air dry clay toys? Explore 12 practical tips that help beginners and parents create smooth, durable, and creative clay toys with ease.

A practical guide to the best colored air-dry molding clay—covering texture, color quality, durability, and child-safe materials.
A practical guide on pre-colored air dry clay safety, including potential risks, handling tips, and ensuring safe creative play for children.