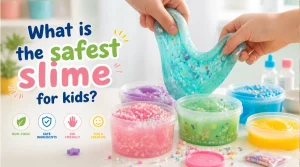
What is the safest slime for kids?
Explore what makes slime safe for children and learn simple ways to support fun, responsible, and healthy sensory play at home or school.

Get your slime game on! Discover the wonders of activators and create the perfect squishy slime every time!
Creating slime is a fun and creative process, but it relies heavily on one important ingredient: the slime activator. This component is essential in transforming ordinary glue into the stretchy, gooey substance we all love.
A slime activator is a substance that initiates a chemical reaction, changing glue from a liquid form into a solid, moldable slime. When you mix glue with an activator, you start a process called cross-linking. This reaction binds the glue molecules together, resulting in that delightful, stretchy texture. Without an activator, your glue would remain a simple liquid, lacking the fun and squishy qualities of slime.
There are several types of slime activators you can use. Some of the most common ones include:
Each of these activators offers different textures and properties, allowing for endless slime variations.
The role of a slime activator is crucial. When you add it to glue, it triggers a chemical reaction that links the glue molecules. This process is what makes the slime stretchy and fun to play with. Without an activator, the glue would stay runny and wouldn’t form the solid mass we enjoy.
Think of it like baking a cake. Just as you need baking powder to help the cake rise, you need an activator to help glue transform into slime. This transformation is what allows you to stretch, squish, and mold your slime into different shapes.
Understanding slime activators is key to mastering the art of slime-making. So, grab your glue and activator, and let the fun begin!
Understanding how slime activators function can enhance your slime-making experience. These activators do more than just mix with glue; they trigger fascinating chemical reactions that give slime its unique properties.
At the core of slime-making is a concept called polymer science. Glue contains long chains of molecules known as polymers.
When you add a slime activator, it causes these polymers to link together, creating a network. This process is called cross-linking. The more links you have, the thicker and stretchier your slime becomes.
Imagine a spider web: the more connections it has, the stronger it is. Similarly, the more cross-links formed by the activator, the more fun and bouncy your slime will be. This is why activators are essential in achieving that perfect gooey consistency.
Let’s break down what happens when you add an activator to glue.
Each step plays a vital role in transforming glue into that beloved, moldable slime.
Not all activators are created equal. Each type can yield different slime textures and consistencies.
Experimenting with these activators allows you to craft a variety of slimes—from crunchy to smooth. So, mix it up and discover what works best for your slime-making adventures!

Choosing the right slime activator is crucial for creating your ideal slime. Different activators yield various textures and consistencies, making the slime-making process both fun and scientific.
Borax solution is one of the most popular slime activators. It consists of borax powder mixed with water. When combined with glue, it initiates a strong cross-linking reaction, turning the liquid into a stretchy, firm slime.
To use borax safely, mix one teaspoon of borax with one cup of warm water. Make sure to stir until dissolved. When adding it to your glue mixture, do so slowly.
This helps you achieve the desired texture without making it too firm. Always supervise kids when using borax, as it can be irritating if ingested or used improperly.
Contact lens solution is a common alternative to borax. It contains ingredients that help bind the glue, especially when combined with baking soda. This duo creates a stretchy and pliable slime that’s easy to handle.
To use this activator, mix one tablespoon of baking soda into your glue. Then, slowly add contact lens solution until the slime starts to form. This method is convenient and popular for kids and adults alike. Plus, it’s readily available at most stores.
Liquid starch is another effective slime activator. It works by allowing the glue to form a smooth, elastic slime. When using liquid starch, the process is straightforward: mix it directly with your glue until you reach the desired consistency.
The advantage of liquid starch is its ability to create a softer slime. Many people enjoy the silky feel it provides. It’s also less messy than some other activators, making cleanup a breeze.
Combining baking soda with saline solution is a great way to create slime without using borax. Baking soda acts as a thickener, while the saline solution helps with the binding process.
To make slime with this method, mix one tablespoon of baking soda into your glue. Then, slowly add the saline solution until it starts to thicken. This combination results in a stretchy, fun slime that’s perfect for crafting.
If you’re out of traditional activators, there are some household alternatives you can try. For instance, laundry detergent or dish soap can work in a pinch.
When using laundry detergent, start with a small amount and mix it into your glue. It may take some experimenting to find the right balance. Soap can also create a fun slime, but be cautious with the amount, as too much can make it too runny.
Exploring different slime activators allows you to discover the unique textures and properties of your creations. Experimenting with these options can lead to endless fun and creativity in your slime-making adventures!
Selecting the right slime activator can significantly impact your slime-making experience. With various options available, it’s essential to choose one that suits your needs and preferences.
When deciding on a slime activator, consider several factors.
One of the best parts of slime-making is experimenting! Don’t be afraid to try different activators to see how they change your slime. For example, you could start with borax for a classic stretchy slime, then switch to contact lens solution for a softer feel.
As you experiment, keep notes on what works and what doesn’t. This way, you can perfect your recipes over time. Try mixing activators too—maybe a little liquid starch with saline solution to create something unique. Each combination can lead to new textures, like soft or crunchy slime.
Different types of slime call for different activators. Here are some recommendations:
Choosing the right activator not only enhances your slime’s texture but also makes the entire process more enjoyable. Explore, experiment, and most importantly, have fun creating your perfect slime!
While making slime is a fun and creative activity, it’s important to keep safety in mind when using slime activators. This ensures a safe experience for everyone involved, especially children.
Borax is a popular slime activator, but it can pose risks if not used correctly. It’s essential to keep borax out of reach of young children, as it can irritate the skin and eyes.
When using borax, always mix it with water first, and supervise kids during the process. A good rule is to wash hands thoroughly after handling any chemical activator.
If you choose to use other chemical activators, such as liquid starch, read labels carefully. Some may contain ingredients that can cause reactions in sensitive individuals. Always prioritize safety and follow the recommended usage guidelines to prevent any mishaps.
For those who prefer a more natural approach, there are eco-friendly slime activators available. Options like cornstarch mixed with water or using natural glue can be great substitutes. These alternatives are generally safer and non-toxic, making them ideal for younger children.
Additionally, many people enjoy using contact lens solutions combined with baking soda. This combination is effective and less harmful than traditional chemical activators. It’s a wonderful way to make slime while being mindful of the environment and health.
How you store and handle your slime activators is crucial for safety. Always keep activators in clearly labeled containers to avoid confusion.
Store them in a cool, dry place, away from direct sunlight. This helps maintain their effectiveness and prevents accidental spills.
When handling activators, use gloves if necessary, especially with stronger chemicals. After using them, make sure to clean up any spills immediately to prevent slips or accidents.
Making slime at home is an exciting project that combines creativity with a little science. Using the right activator is key to achieving the texture you want. Here’s a simple guide to help you get started!
Ingredients:
Instructions:
Now you have stretchy, fun slime to play with!
Ingredients:
Instructions:
This method yields a soft, stretchy slime that’s easy to customize!
Sometimes, slime doesn’t turn out just right. If your slime is too sticky, it might need more activator. Gradually add a bit more borax solution or contact lens solution until it reaches the desired texture.
If the slime is too firm or hard, it might mean you added too much activator. To fix this, try adding a little warm water and kneading it well. This should soften the slime and make it more pliable.
Slime activators are essential for transforming glue into the fun, stretchy substance we love. By understanding the different types of activators—like borax, contact lens solution, and liquid starch—you can customize your slime to achieve various textures. Remember to prioritize safety and experiment with recipes to discover your perfect slime.
Explore what makes slime safe for children and learn simple ways to support fun, responsible, and healthy sensory play at home or school.

Explore the key traits behind best-selling slime products on Amazon, from texture and safety to developmental value and consumer demand.

How is slime quality maintained at scale? Explore the systems, testing methods, and standards used to ensure batch-to-batch consistency.

See how 2026 creative toy trends in slime, clay, and sensory play support child development, imagination, and calm-focused play.